Showing off the weird shape, in ‘Dartmoor Illustrated’ by TA Falcon (1900).
Showing off the weird shape, in ‘Dartmoor Illustrated’ by TA Falcon (1900).

A secondary row, the site is best appreciated by following an aerial photo to understand the full glory of what is going on here

The whole magnificent complex covering the hill side, stone rows, cairns, pounds, you need a lot of time to explore this site, truly remarkable place

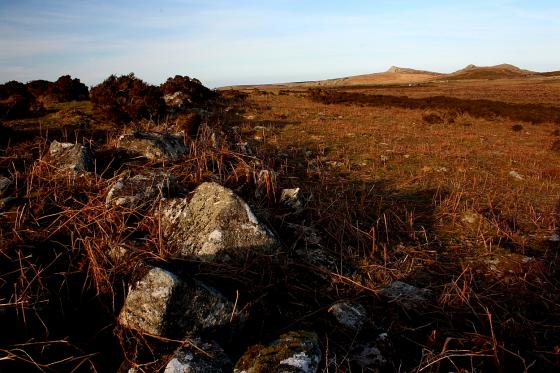
Looking back across the valley

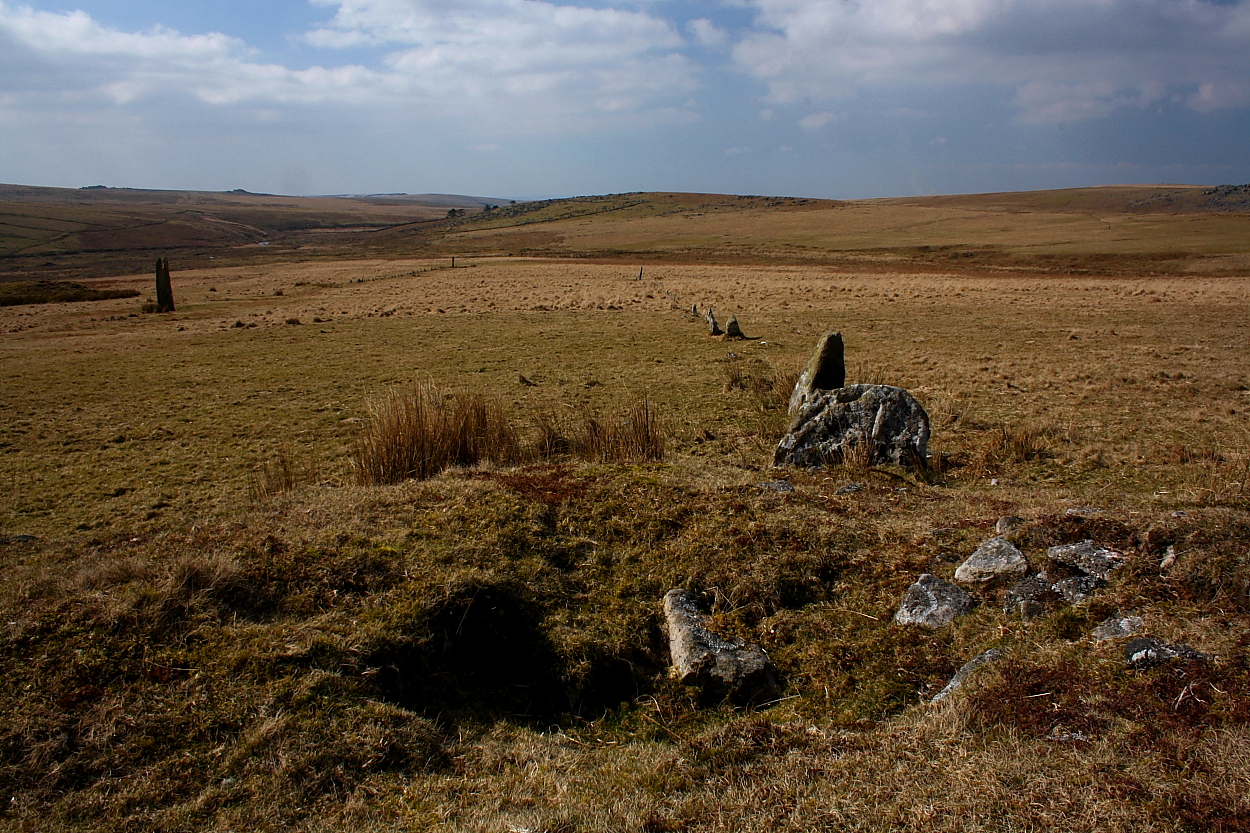
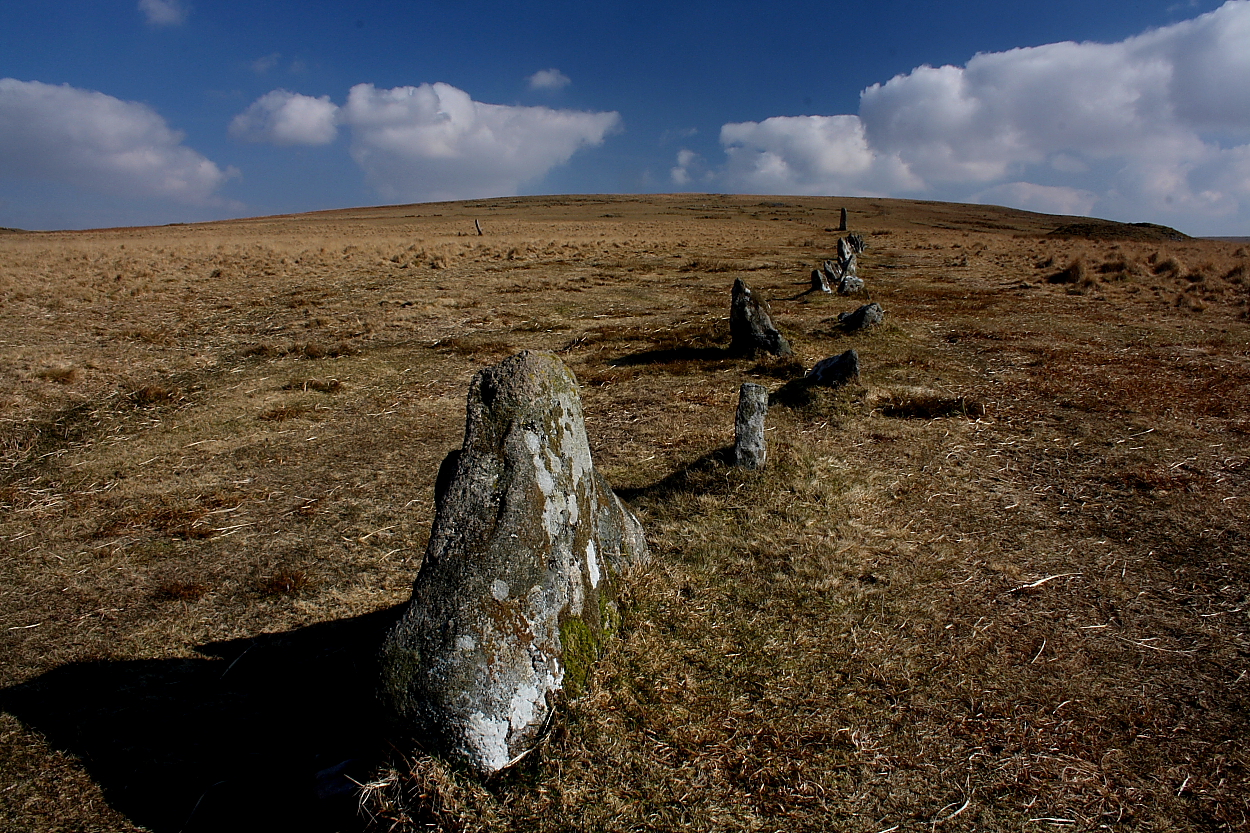
The magnificent primary stone row stretching out up the hill side

Drizzlecombe from the great northern cairn....

The great northern cairn....

Cairn associated with the southern row... not much sign of a kerb...

Cairn-circle to western row – a lovely monument in its own right. Note there is a further cairn to its west, devoid of any row.

A’top the Giant’s Basin... the reason for the name is clear from here.

Cairn-circle, north-eastern row.
Cairn-circle, western row.
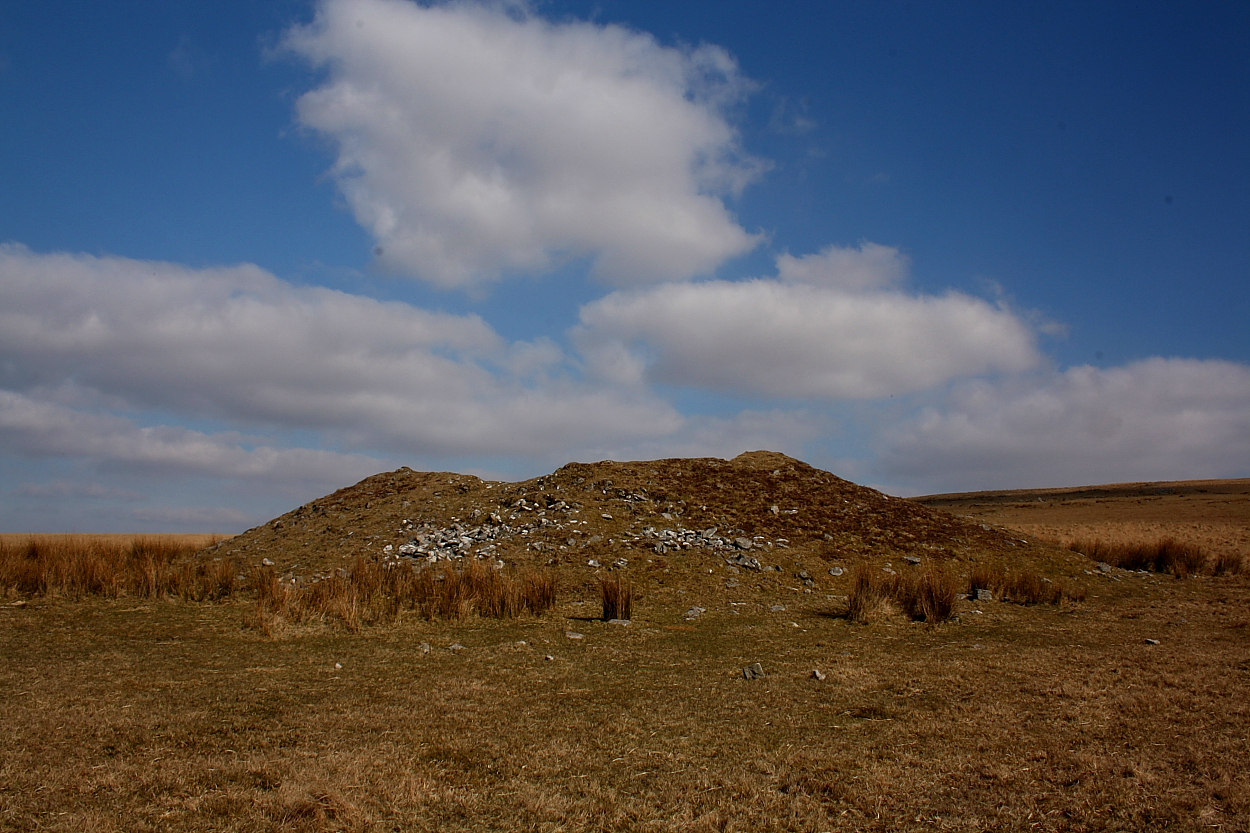
The Giant’s Basin.

The massive Giant’s Basin cairn... there’s something for every taste here at Drizzlecombe.

Western row looking toward the north-eastern terminal stone

Southern row looking approx south-west. It’s a double...

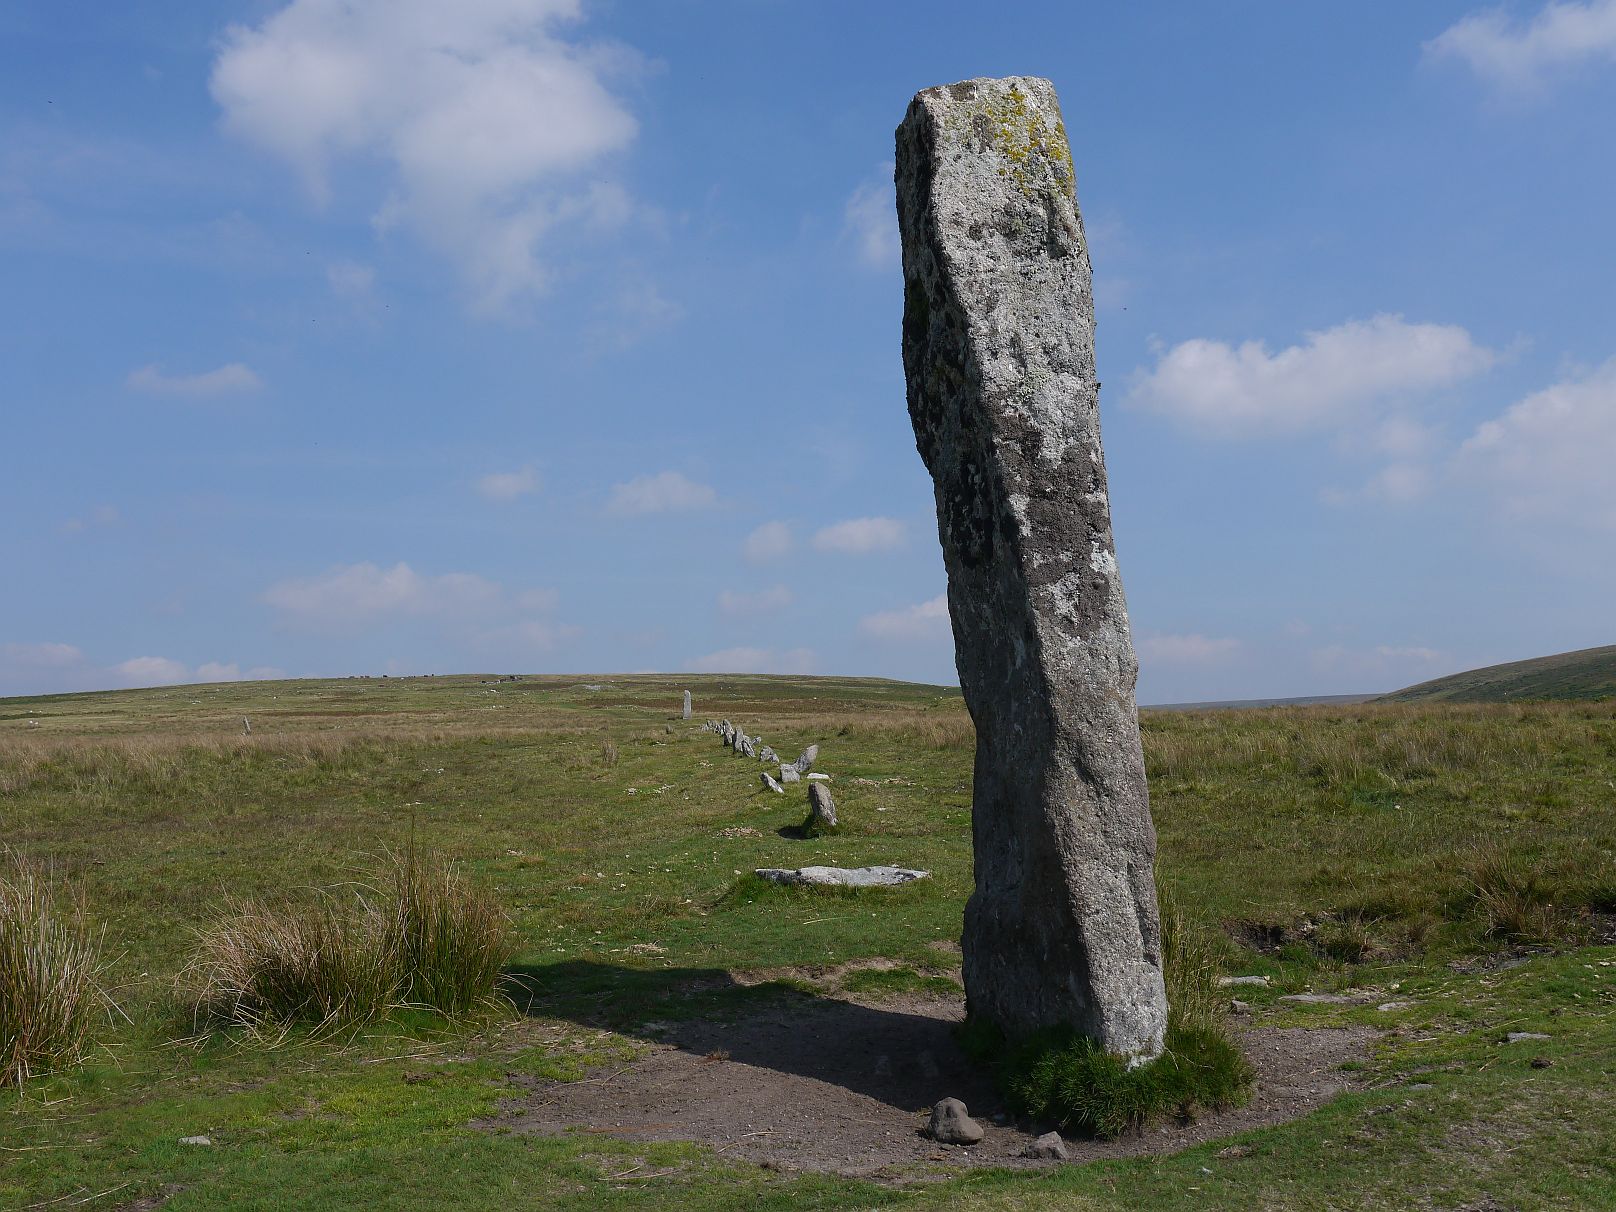
Don’t think I’ve seen a more handsome stone that wasn’t of Lewissian Gneiss......

North-eastern terminal stone...

The awesome terminal stone of the north-eastern row... apparently the tallest monolith upon Dartmoor.

Terminal stone, western row...

Southern row , looking approx north-east. The Giant’s Basin looms large, top far right.

Looking along the southern row... the terminal stone of the northern and western rows can be seen beyond.

Southern row terminal stone...

September 2014

September 2014

September 2014

September 2014

September 2014

September 2014

September 2014

September 2014

September 2014

September 2014

September 2014

September 2014

September 2014
September 2014

September 2014


The lovely 3m terminal stone at the SW end of row 1, with the row stretching away to the left.

The terminal cairn (cairn 2) at the NE end of row 2.

The enormous terminal stone at the SW end of row 2.

Row 2, running from SW terminal stone in the centre of the shot to NE cairn over on the right.

Cairn 1, the terminal cairn at the NE end of row 1.

The large fallen slab at the NE end of row 1, next to the terminal cairn.

Row 1’s finely tapering SW terminal stone.

Looking NE along the double section of row 1.

The Giant’s Basin. In the foreground are the remains of cist 6.

Looking NE along row 3.

The 2.4m tall terminal stone at the SW end of row 3 (the NW row).

You ain’t seen me, right?

You want animals? We got animals! Row 2’s terminal stone and the Giant’s Basin cairn (note strategically placed sheep), more frequented by four-legged than two-legged visitors.

Terminal cairn circle 3. The stone on the left is the end of the stone row.

The central terminal cairn (Cairn 3), at the NE end of the NW row (Row 3). This is a proper cairn circle, with an outer ring of uprights around the base of the cairn.

Cairn 4. This complex cairn is constructed of at least two rows of small concentric slabs. The outermost ring is set a way outside the mound (see stones on left of picture).

Cairns 2, 3 and 4 (l-r). Cairns 2 and 3 are the NE terminals of stone rows, whereas Cairn 4 doesn’t have a row (although some theories suggest it was intended to).

General view of the Giant’s Basin cairn and Drizzlecombe rows, seen from Cairn 18 (to the NE).

The ravaged top of Cairn 18.

The impressive 20 metre diameter Cairn 18.

Cairn 18 (SX59376717), the second biggest cairn in the complex.

Remains of hut circle. Behind are the low walls of Settlement A, the northernmost of a row of three settlement enclosures situated to the NE of the stone rows.

Another view of cairn 15, showing the upright slabs in the ruined centre.

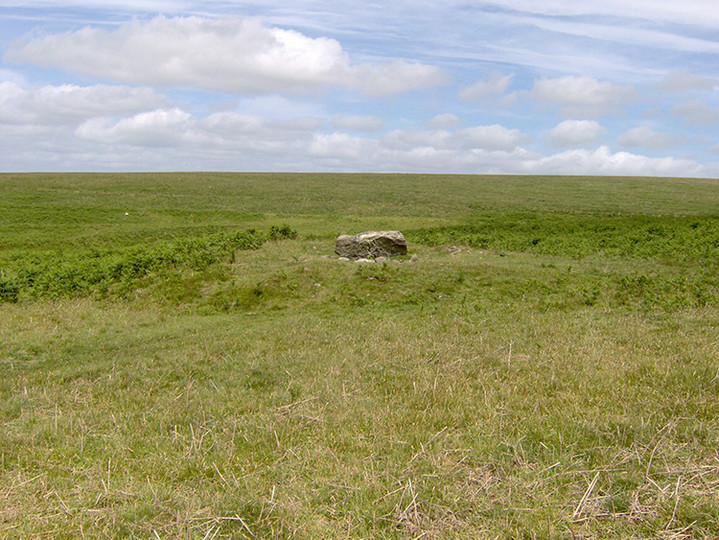
Drizzlecombe cairn 15 (SX59256721), to the NE of the stone rows.

Sunset 19/6/08


me looking at the sunsets afterglow, next to the tallest stone in Devon

Drizzlecombe – March 2004

Drizzlecombe 1st March 2004

Sunday 3 July 2005 View along the main rows from the southern of the smallish twin cairns

Sunday 3 July 2005 One of the local divebombing wheatears takes a rest while a passing family examine the stones.

Sunday 3 July 2005 The main rows and longstones looking SSW, the northern of the smallish twin cairns in the foreground, and the NW standing stone just visible on the right

Sunday 3 July 2005 The main row leading NE from the southern longstone, towards the Giant’s Basin on the right and the northern longstone

Sunday 3 July 2005 The kist in the cairn at SX591672 with the main rows marching past in the background to the south

Sunday 3 July 2005 The standing stone to the NW of the main rows and its stone row leading to the northern of the smallish twin cairns

Sunday 3 July 2005 The smaller part of the ‘main’ rows, leading NE to the southern of the smallish twin cairns

Sunday 3 July 2005 The length of the main row is pretty impressive!

Sunday 3 July 2005 A marker stone on the hillside in the foreground on the way towards the complex from Yellowmead

This chinese writing is carved on the tallest stone in the complex.

The row with the double section looking from the cairn end.

The kist in the cairn at SX591672. One of the best in the area,if not the best.
The cairn and kist at SX591672

The Giant’s Basin

Looking west from above the stone rows

Wow!!!

Giants Basin with eastern stone row behind.

The northern row from the bottom (Eastern row in background)

Double row looking uphill

Looking up the stone row from the lower menhir.

The “mystery” stone north of the stone rows.

The stone rows from Whittenknowles Rocks

The kist at SX590667

The kist at SX592674.

The kist in the cairn at SX596673.

The cairn at SX596673 is almost on the top of the hill out of site of the rest of the antiquities on the north east side.

The cairn at SX591672 is to the north west of the row of cairns at the end of the rows.

The kist at SX591669 is a small pile of stones at the north west edge of the Giant’s Basin.

Looking along the longest row from the largest stone.


Drizzlecombe Complex – 23.6.2004 – The terminal stone of the more northerly stone row, looking towards the enormous terminal stone of the north east part of the south row.

Drizzlecombe Complex – 23.6.2004 – part of the more northerly stone row ending at it’s slender but impressive terminal stone.

(1 on sketch plan)
Row 1 longstone – Row 2 longstone in distance.

(6 on sketch plan)
Row 1 from cairn.

(4 on sketch plan)
Row 2 from longstone

(2 in sketch plan)
Row 2 from cairn – with Row 1 off to distant right.

(3 in sketch plan)
Row 3 from cairn.

(5 in sketch plan)
Row 3 from longstone. Row 2 longstone to right.

(7 in sketch plan)
General view over site from Row 3 cairn. Row 2 longstone is visible in the centre with Row 1 running to the right of it. Further to the right, Row 3 longstone may just be made out.

Sketch map of the rows.
The row numbers (1,2,3) are in black. The red numbers correspond to the photo locations.

This was taken kneeling and looking up at the Giant’s Basin. The cairn’s and rows are on the other side. This gives a good idea of the size.

this shows the angle at which two of the cairn/row/terminals have in relation to the Giant’s Basin.

one of the tall terminal stones with row leading back to cairn, this one is to the right of you if you are sitting on the Giant’s basin!

taken from the cairn that has the longer row, you can see another row in the distance on the left. Also, note the slight kink in this row towards the terminus.

This was taken from a cairn looking down its row to its tall terminal stone, in the distance is another cairn/row/tall-terminal, on the left is the Giant’s Basin, the other row’s terminal stone can be seen towards the right of the photo.
The ground slopes away to the valley of the nascent River Plym. Between my vantage point and there, an incredible array of monuments and animals is laid out. Cows, sheep and horses fill the space, interspersed with very large upright stones dotted here and there. I’ve found the rows, at any rate.
But the ground above the “ritual” complex is itself packed with archaeology. Settlement enclosures, round houses and cairns vie for position. One of the first cairns I come across (cairn 15) has some unusual upright stones in its mound, which appear to be in-situ. It’s right next to a hut circle. As ever, I don’t have the knowledge to really understand the phases of what I’m looking at, which came first and whether the living were sharing their space so closely with the dead. One cairn, much bigger than the rest (cairn 18), is a good spot to view the rest of the site below.
From atop the cairn, the layout of the rows becomes clear, together with their proximity to the even larger Giant’s Basin cairn. Three large terminal stones are readily visible, as are three cairn circles in a line at the northeast of the rows. A large herd of cows and another of horses are clustered around the tallest of the terminal stones and other cows and sheep are busy grazing across the site. There are no people to be seen and I get the impression of being an intruder into this primal space.
But the sun is shining and I’ve travelled a long way to come here, so I’m going to carry on intruding for a while longer yet. The NW of the three cairn circles doesn’t have a row of its own, although a low outlier some way to the southwest (which I don’t try to find in the bracken today) may indicate an intention that it was to have. This cairn is surrounded by a couple of rings of small slabs, suggesting a complex constructional method.
The central cairn circle has a more obvious outer ring of uprights, and is at the northeastern end of one of the three stone rows that form the complex. The centre of the cairn exhibits the usual central doughnut of excavation. A walk along the row ends in the first (and smallest) of the three enormous terminal stones. This one is a tapering slab, 2.3m high, placed edge on to the row and leaning slightly.
I head towards the southwestern row’s terminal stone, but a group of bullocks are getting increasingly lairy around it (once they start trying to shag each other, it’s time to back away). So instead I cut across to the Giant’s Basin cairn. I do get a good look along the southwest row though, worth noting particularly as it’s a double row for part of its length. At its northeastern end is another cairn circle. The slabs at this end of the row have fallen and lie prostrate near the cairn. In addition, there is a small cist between the cairn circle and the Giant’s Basin cairn – talk about packed with archaeology! Row 2, well-seen from the Giant’s Basin, ends in the largest of the three terminal stones. At over 4m tall, this is the tallest standing stone on Dartmoor. Today, four-legged acolytes, cows and horses, surround it. I don’t get too close for fear of upsetting a ceremony of sorts. Its row is the shortest of the three and also ends in a cairn circle, another decent mound surrounded by an incomplete ring of slabs.
I’m awestruck by this amazing place. The primal energies of the animals seem to do it justice and once again I’m filled with the sense that I’m a passer-by, a temporary presence in an ageless space. The bullocks have gradually headed along the southwestern row now, so I skirt their proceedings and make for the now-vacated south-west terminal stone. It’s a lovely symmetrical, tapering 3m slab, again facing edge-on to the row.
What a place. I finally leave the complex, heading towards Ditsworthy Warren. I hope to come here again, this is a site to treasure.
One of the most visually impressive of Dartmoor’s unique stone-row complexes, both because of the size of the end stones and also because, being set down in the Plym valley, the entire complex can be viewed in its entirety.
The ritual hypothesis would seem to be supported by its proximity to the river and also the nearby dwelling sites. Dartmoor’s well preserved complexes such as this and Merrivale are, to me, among the most thought provoking and enigmatic prehistoric monuments in the UK.
After a five hour drive down motorway and across the moors I almost yelped with joy to finally get to these stones, the sunshine was glorious and the stones tall, well, three of them were. I parked near the scout hut, walked straight to Wittenknowles settlement on the low hilltop and back down the other side, all in all, a fifteen minute walk.
The tallest menhir in Devon is here about 14 feet tall I think, and so much more, cairns with rings of stones, a beautiful cist (you’ll know which one) long lines of stones sometimes double rows, and the large barrow(giants basin) overlooking it all. Throw in the sound of running water, some birdsong and a lovely sunset and your in a megalithic paradise, plus I had the whole place to myself. Although the stone rows are more likely to be roughly aligned towards the winter sunset
A good couple of hours are needed to appreciate it fully.
There are twenty two cairns spread around the hillside of the complex.Five of these still contain kists two of which are in the centre of quite substantial mounds.The other three are very small to almost nonexistant, as with the one at the north west edge of the Giant’s Basin.
The best way to access the site is to park near the so called scout hut at SX579673.Space here is very limited so an early arrival would be best.From here you walk across the stream ahead of you and head up the hill towards Eyelsbarrow.A s you pass the scout hut[now used by the Royal Navy for training purposes] there is a leat,cross this and then turn right and go in a south easterly direction towards Whittenknowles Rocks.You will come apon a quite well preserved settlement here,well worth spending some time looking at.To the west side of the settlement there are the remains of two medieval long houses built amongst the walls of the prehistoric dwellings.From here you should be able to see the antiquities of Drizzlecombe so you can head down hill towards them.There is however a small amount of wet ground to cross as you come upon the tin workings around the Drizzlecombe.This is not too difficult to cross and can be done, with a little care ,keeping your feet dry.
Drizzlecombe Complex – 23.6.2004
This is such an amazing complex, but I made the cardinal sin of not having hardly any time to visit. It definately does deserve a few hours, and it a bit of a trek to get to.
Directions – Again, I basically agree with the travel instructions on the Megalithic Walks link below, but be slightly warned that despite this being marginal land everywhere there don’t seem to be hardly any spaces to actually park at his so-called car park!
For the less mobile, or for those who want a more a sure footed route towards Drizzlecombe an alternative route for part of the way is to walk along the well made track towards Ditsworthy Warren House. This track starts from a fork just as you come towards the car park and winds around Gutter Tor and over to the house.
As you round Ditsworthy Warren House, you will soon seen the Drizzlecombe complex in the distance, which emphasises just how large two of the stones are. Don’t be tempted (as I was, like a kid seeing a sweet shop) to head straight for the stones in the distance. It can get pretty marshy that way. As you head down the hill bear slightly right, it’s definately a bit drier that way.
I can’t say much about the Drizzlecombe complex except please visit, and please allow some time to marvel at all the various remains in the area. The complex is in a remarkable bowl with various hills and minor Tors hemming it in.
Difficult site to describe without a plan so I have posted a sketch plan.
All rows run NE/SW and have cairns at their NE ends (uphill) and longstones at their SW ends.
Row 1 is 150m long and ends in a 3.0m high longstone – its broad face in line with the row. The SW half of the row is a single row which then becomes double for 47m then single again.
The Row 2 longstone is 4.2m high (the tallest standing stone on Dartmoor). Its broad face cuts across the line of the row. The row is 83m long – single with several large gaps.
Row 3 (like Row 1) is 150m long but is single throughout. Its longstone is 2.3m high.
The Giant’s Basin cairn (22m diameter by 4m high) sits to the SE of the Row 1 cairn.
There are several other cairns at the site not marked on the plan.
This, for me, is a must-see site. It is more than possible to see Drizzlecombe, Brisworthy, Ringmoor and possibly Shaugh Moor and Yellowmeade in one day.
The complex lies on a valley floor near a river and is well worth any effort to reach it. There are three cairn cirles, each with its own stone row. Two of these rows have very tall (3 metres?) stones at the non-cairn end. They really do make an impressive site. Situated between the rows and the river is ‘the Giant’s Basin’ standing a good few metres high it must have been an impressive mound before looting/excavation (?) ripped it open.
There are other cairns in the area, particularly on the hillside between the complex and the path from the carpark.
johan
Watch out for the big cats, if this tale of schoolboys on ‘Farshores’ is to be believed.
100megsfree4.com/farshores/c_dart.htm
The site includes a group of small stone circles around cairns, long rows, standing stones, cists, cairns, hut circles and pounds.