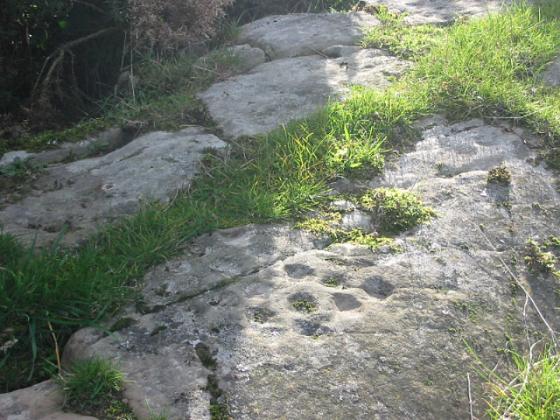
The cotton grass confirms that this is indeed bog!
Images
Some landscape perspective, with Cambret Hill dominating above to the left....
The ‘circle from a’top the cairn....
Two of the larger othostats....
The circle, with substantial cairn beyond...
25/2/06
wolfy
25/2/06
wolfy
25/2/06
wolfy
Articles
Perhaps the most straight forward route to this wonderfully remote, moorland site is from Cambret Farm..... however..... not wishing to duplicate part of yesterday’s walk (to Claughreid) and with an eye on obtaining a quite literal overview of the inter-relationship between the numerous monuments in the locality, I decide to approach from the summit of Cambret Hill to the approx NW. This is initially not as difficult as it may sound, since a tarmac road, albeit not in the best of repair, snakes its way up to the summit from the NE to provide access to several telecom antennae. These are, of course, unwelcome intrusions, yet the viewpoint they surmount is excellent through the entire 360 arc, ensuring one happy Gladman, despite the searingly cold wind.
The fabulous Glenquickan ‘circle lies near forestry to the west, Claughreid to the approx south-east. But, of course, it is the massive cairn, beside the prosaically named Cauldside Burn, which holds the gaze, despite being totally dominated by the towering crags of Cairnharrow rearing above it across the valley.... hey, humankind may have felt the compulsive need to erect our monuments to Nature, but nothing, I said nothing can beat the real thing.
As I descend towards the site, a most excellent, not to mention large, wild stallion (cue air guitar) noisily asserts his dominance of this hostile landscape, confronting the intruder head on. Wisely, I think, I circle around him and don’t blatantly challenge his ‘horse-hood’. Anyway, after crossing a fence-line (by gate, if I recall correctly) a little bit of serious ‘bog bashing’ sees me at the monument, struggling to find a dry bit to hang out upon. Granted, quite a large arc of the circumference of the ‘circle is missing, but several of the remaining orthostats are substantial, bear exquisite lichen, and stand right beside a stonking great big cairn with remnants of cist to the NNW. Wait... there’s more... beyond the cairn there are two small stones which Burl reckons precede an overgrown ring cairn. I struggle to make out the latter, but am nevertheless happy knowing it is there.
As with many moorland ‘circles, I would suggest the aim here was pretty obviously not to impress, but simply to provide spiritual functionality to a family group. No point trying to impress the gods when they have created landscape features that completely overawe anything you can possibly contemplate, is there? Whatever its value to its builders, whatever rituals were practised here, I feel this circle still retains its relevance, even after millennia... for to be here is a very evocative experience indeed. Hell, here I have the opportunity to clear my head of all distractions and simply ‘be’ for a few hours. I thank Mr Burl and Mr Cope for initially inspiring me to seek out places such as this. Gentlemen, it has been emotional.
Although my attempts to find some of the rock art which also adorn the area prove fruitless – not surprisingly – I ascend back to the car deeply moved by Cauldside Burn.
According to RCAHMS:
“This peat-covered stone circle is situated in the saddle between Cambret Hill and Cairnharrow, and it lies immediately to the SSE of a large round cairn (NX55NW 22). Nine stones survive on the N and W arcs of the circle but only two others are visible on the remainder of the circumference; together, they define a circle about 25m in diameter. The largest surviving stone, which lies on the WSW, stands to a height of 1.2m and measures 0.8m by 0.2m at the base. The stones are all thin slabs, with their broad faces aligned on the circumference of the circle.
What may be an outlier to the circle lies some 100m to the NNE (NX 5298 5723); it comprises a flat slab protruding from the peat with its long axis orientated towards the centre of the circle”
Pics of Cauldside Burn cairn and ruined circle.
Sites within 20km of Cauldside Burn
-
Cauldside Burn Cairn
photo 7link 1 -
Cauldside Burn Stone Setting
photo 2description 1link 1 -
Cauldside Burn Cairn North
photo 2description 1link 1 -
Cambret Moor
photo 7description 3link 1 -
Cambret Moor
photo 10description 1link 1 -
Cairnharrow
photo 7description 3link 1 -
Cairnharrow
photo 14forum 1description 1link 3 -
Claughreid
photo 12description 4link 1 -
Glenquicken Moor
photo 5description 1 -
Cairnholy 10
-
Cairnholy 06
photo 1 -
Glenquicken
photo 31description 8link 3 -
Glenquicken Cist
photo 10description 3 -
Blackmyre Moor
photo 4link 1 -
Cairnholy 07
-
Upper Newton 4
-
Cairnholy 05
photo 2 -
Upper Newton 1
photo 3link 1 -
Cairnholy 08
photo 1 -
Whiteside
photo 2link 1 -
Cairnholy 04
photo 1 -
Cairnholy 09
photo 5 -
Cairnholy 03
-
Barholm 3
photo 1link 1 -
Cairnholy Cairn
photo 3description 1link 1 -
Upper Newton 2
photo 5 -
Bagbie Cairn
photo 11description 2link 2 -
Bagbie Four Poster
photo 7description 2 -
Upper Newton 3
photo 4 -
Bagbie Wall Stone
photo 5description 1link 1 -
Blackmyre Farm
photo 1link 1 -
Bagbie Stone
photo 6description 2 -
Kirkmuir 4
photo 1 -
Kirkmuir 3
photo 1 -
Cairnholy
photo 98ondemand_video 1forum 3description 15link 6 -
Cairnholy 01 & 02
photo 6forum 1description 1link 1 -
Kirkmuir 1a & 1b
photo 1 -
Kirkmuir 2
photo 1 -
Kirkmuir
photo 1link 2 -
Lagganmullan 5
photo 2 -
Bardristane 4
photo 6 -
Bardristane 3
photo 3 -
Lagganmullan 3
photo 4 -
Bardristane 1
photo 4link 1 -
Kirkdale Mains Stone
photo 1 -
Lagganmullan 4
photo 13 -
Lagganmullan 6
-
Lagganmullan 7
photo 2 -
Lagganmullan 7a
photo 5 -
Lagganmullan 7b
photo 3 -
Lagganmullan 7d
photo 5 -
Lagganmullan 7c
photo 2 -
High Auchenlarie
photo 9description 1 -
High Auchenlarie
forum 1 -
Lagganmullan 2
photo 6 -
Lagganmullan House
photo 1link 2 -
Kirkdale House
photo 1forum 1link 1 -
Barholm 1
photo 1 -
Lagganmullan 1
-
Doon of Carsluith
photo 7description 1 -
Lagganmullan 8
photo 10description 1 -
Lagganmullan 9
photo 6 -
Lagganmullan 10
photo 3 -
Barholm 2
photo 1 -
Laggan Farm
photo 2link 1 -
Rutherford’s Witnesses
photo 4description 2 -
Kirkmabreck
photo 13link 1 -
White Cairn, Chapelton
photo 2description 1link 1 -
Newton Farm
description 1 -
Kirkclaugh
photo 1 -
Kirkclaugh
photo 1forum 1link 1 -
Newton Farm Burial Chamber
photo 5description 2link 1 -
Newton Farm
photo 1description 2 -
Rutherford’s Well
photo 4description 2link 1 -
Mossyard 6
photo 5description 1link 1 -
Mossyard 1
photo 6description 1link 2 -
Mossyard
photo 15description 2link 4 -
Trusty’s Hill
photo 8description 2link 3 -
Cairn of Knockglass
photo 9description 2 -
Harper’s Hill
photo 9description 1 -
Cairnsmore of Fleet
photo 12description 4 -
Knee of Cairnsmore
photo 7description 2 -
Penkiln
photo 29description 1link 2 -
Culscadden
photo 7link 1 -
Castle Haven
photo 5description 1 -
Bladnoch
photo 6description 3link 1 -
North Balfern HillFort
photo 2 -
Cairnhouse E
photo 3description 2 -
North Balfern
photo 4description 1link 1 -
Billy Marshall’s Cave
photo 7description 1 -
Tongue Croft
photo 16description 1link 1 -
Cairnhouse W
photo 6description 1 -
Auchenhay
photo 2 -
High Baltersan
photo 6description 3link 1 -
Glengap House
link 1 -
Kirroughtree House E
photo 3description 1link 1 -
Arden Fort
photo 4description 1link 2 -
The Doon (Twynholm)
photo 5description 1link 1 -
Lessons
photo 6description 2link 2 -
Kirroughtree House W
photo 4description 1link 1 -
Kirroughtree House
description 1 -
Broughton Mains
photo 18forum 1description 1link 2 -
Kirroughtree House N
photo 3description 1link 1 -
Claunch
photo 13forum 1description 1link 1 -
Ingle Stone
photo 3description 1 -
Redbrae
photo 3 -
Borgue
photo 5link 1 -
Newton Stewart Cairn
photo 2description 2 -
Cunningham
photo 3description 1link 1 -
Torhousekie
photo 53forum 1description 13link 4 -
Torhousekie Stone Row
photo 17description 3 -
High Nunton
photo 4description 1 -
Torhousekie Farm
photo 7description 2link 1 -
Torhousekie
photo 4description 2link 2 -
Clauchendolly
photo 51description 1link 2 -
Culnoag
photo 6description 1 -
Cairn Hill (Barraer)
photo 7description 2 -
Senwick 1
photo 5 -
Senwick 4
photo 8 -
Clash
photo 8description 1link 2 -
Brighouse Standing Stone
photo 5link 1 -
Giant’s Dike
photo 5description 1link 1 -
Hole Stone
photo 7description 5link 1 -
White Cairn, Crouse
photo 3description 1link 2 -
Park of Tongland
photo 2description 4link 1 -
Gallows Outon 1
photo 2link 2 -
Gallows Outon 2
photo 2link 2 -
Boreland
photo 10description 4link 2 -
Culgarie
photo 8description 3link 1 -
Boreland
photo 2description 2 -
White Cairn, Clatteringshaws
photo 2description 1link 1 -
Park of Tongland
forum 1description 1 -
White Cairn, Boreland
photo 5description 1link 1 -
Boreland
photo 2description 2 -
Drumwhirn Cairn
photo 3description 1link 1 -
Barclye Rocking Stone
photo 6description 1 -
Cairn Wood (Barskeoch)
photo 15description 2 -
Barclye Cairn
photo 13description 1link 1 -
Grange 2
photo 2link 1 -
Little Balsmith
photo 8 -
Drannandow Cairn
photo 5 -
Culdoach
photo 18description 2link 2 -
Grange 3
photo 8description 2link 1 -
Rorie Gill’s Cairn
photo 7 -
Drannandow
photo 25description 1 -
Grange 1
photo 2link 2 -
Torrs 1 & 2
photo 11link 1 -
Whithorn
description 2 -
Drumfern
photo 11description 1 -
Drumfern
photo 7 -
Torrs 10
photo 1forum 1link 1 -
Torrs 3
photo 8description 2link 2 -
Blair Hill
photo 18description 2link 1 -
Drannandow W
photo 5description 1link 1 -
Torrs 3b
photo 1 -
Torrs 7
photo 1link 1 -
Torrs 4
photo 7link 1 -
Knockshinnie
photo 10link 1 -
Torrs
photo 5description 1link 2 -
Drummore
photo 7description 3link 1 -
Knockshinnie 2
photo 8 -
Blackhill Cottage
photo 3link 2 -
Townhead
photo 44forum 2description 3link 2 -
Drummore Castle
photo 3description 1link 1 -
Clatteringshaws
photo 1description 1 -
High Grange 2
-
High Grange 1
photo 13forum 1 -
Galtway
photo 3description 1link 1 -
High Banks
photo 34forum 1description 5link 7 -
Galtway 18
photo 6 -
Barhoise
photo 7description 1link 1 -
Big Balcraig
photo 3description 1link 3 -
Shennanton SE
photo 6description 1link 1 -
Rispain Camp
photo 5description 2 -
Galtway 7
photo 2 -
Bruce’s Stone (Clatteringshaws)
photo 3description 1link 1 -
Balmae 35
photo 1link 2