Trapped in a small enclosure, surrounded on three sides by a massive quarry, but still worth visiting. The tomb lies in a northern ’spur’ of the field immediately east of the quarry entrance. The structure of the chamber is very evident and was constructed with massive, shaped blocks of stone. This would have been a fine wedge tomb once upon a time – now it seems to be just a forgotten relic, left there only because it’s a ‘protected’ monument. I’m glad we decided to check it out.
ryaner


Cairn F is said to be the largest of the Cairns in Carrowkeel (though the cairn on Keshcorran, included in the megalithic ‘complex’ is bigger).
Image credit: ryaner

Cairn F passage grave is aligned north onto Cairn E in the distance.
Image credit: ryaner

The end recess of the cruciform chamber – it’s possibly got a metre-and-a-half of cairn rubble hiding a lot of its lower structure.
Image credit: ryaner

A view south-west over the rubble-filled chamber.
Image credit: ryaner

Foreground is part of the passage with a couple of lintels. Behind them is end recess of the destroyed cruciform chamber.
Image credit: ryaner

The gouge taken out of Cairn F by the ‘exacvators’.
Image credit: ryaner


The ‘court’ feature at the southern end of the long cairn.
Image credit: ryaner

Cairn F in the distance over the roofstone of the western chamber.
Image credit: ryaner


From the backstone of the chamber NNW out of the passage towards Knocknarea.
Image credit: ryaner

Closer in view from the rear of the undifferentiated passage grave at the NNW end of the long cairn. It’s aligned onto Knocknarea.
Image credit: ryaner

NNW over the line of the passage towards Knocknarea.
Image credit: ryaner

Standing stone/possible kerbstone to the east of Cairn D.
Image credit: ryaner

Over Cairn D towards F in the distance to the left and Keshcorran to the right.
Image credit: ryaner


Magnificent bogland foliage in front of Cairn D in Carrowkeel.
Image credit: ryaner

Rubble strewn floor of the subsidiary chamber at Cairn C.
Image credit: ryaner

I love the solidity of the subsidiary chamber roofstone with its covering of peat.
Image credit: ryaner

Secondary chamber under a large roofstone on the southern side of Cairn C.
Image credit: ryaner

Cairn C split between Carrowkeel to the left and Cloghoge Lower to the right.
Image credit: ryaner

The passage of Cairn C is aligned onto the cairn on Keshcorran mountain away to the West-North-West.
Image credit: ryaner


The northern side of Cairn C in Cloghoge Lower townland.
Image credit: ryaner


Looking west – the School Cave is visible above the barrow, and in turn, above the cave, is the ridge with Carnaweeleen passage grave.
Image credit: ryaner


The barrow, with its robbed-out centre, is to the left of the middle of the photo. Next to it is an ‘enclosure’ or rath.
Image credit: ryaner

The view of Lough Labe from the north-eastern edge of the cairn. Who wouldn’t want to be buried here?
Image credit: ryaner


Looking north-east over the exposed part of the cairn towards Lough Labe.
Image credit: ryaner

The exposed top of the cairn, looking south towards Lough Gowra.
Image credit: ryaner

The cairn on Sheecor as we first saw it, looking south. The hill to the right has it’s own cairn.
Image credit: ryaner

The tomb is to the left of the middle of the shot; Thomas stands to the left of Poulagaddy cave entrance.
Image credit: ryaner

Cave entrance (Poulagaddy, The Thief’s Hole) in the foreground, with the tomb in the near distance.
Image credit: ryaner
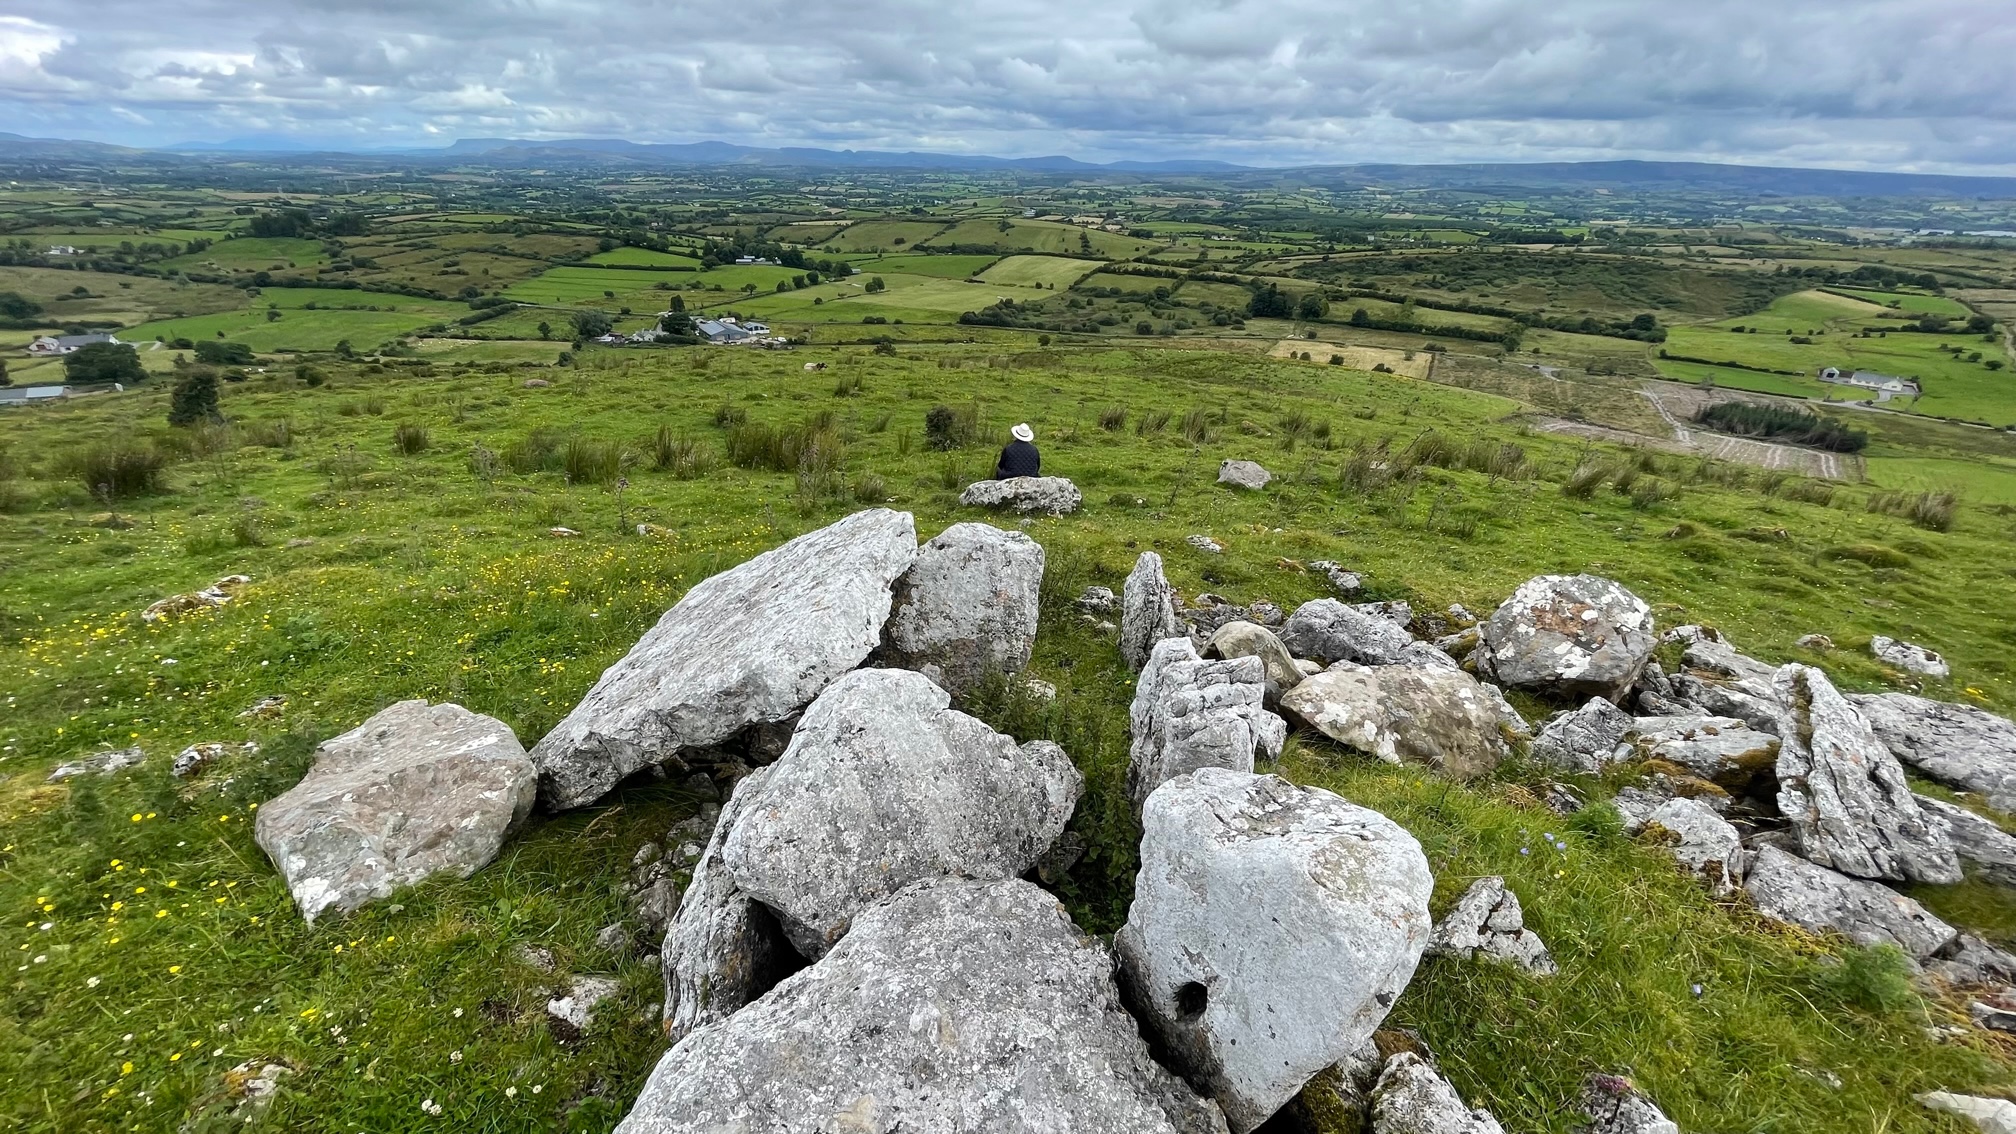


Holed orthostat at the passage entrance – a natural solution pit I reckon.
Image credit: ryaner


From the rear of the chamber – the passage faces north-east.
Image credit: ryaner

On a spur to the north-east of Keshcorran, the ridge to the left of this shot.
Image credit: ryaner

Magnificently placed Cairn B, in Treanscrabbagh townland.
Image credit: ryaner

Light enters the back of the cave through a small aperture – the walls here have a man-made look to them because of the quirky limestone geology.
Image credit: ryaner


The School Cave in the face of the cliff in Carnaweeleen townland . The ridge behind it to the left has Carnaweeleen passage tomb.
Image credit: ryaner