
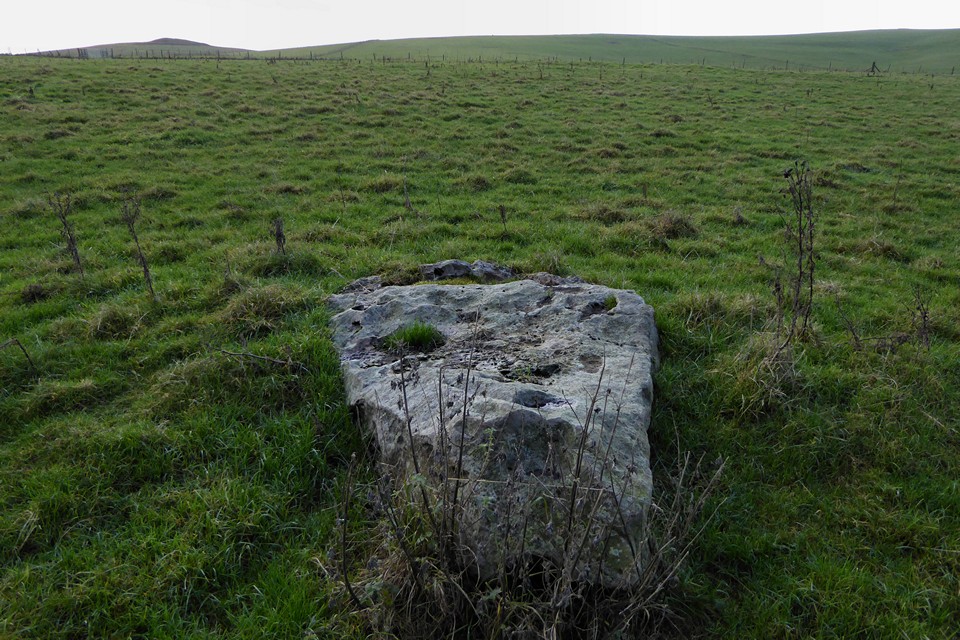
Basins in the largest stone, which lies just outside the ‘circle’.
Image credit: A. Brookes (22.12.2016)

Basins in the largest stone, which lies just outside the ‘circle’.

Looking south along the dry valley. The stones of the row can be seen on the far left. Passmore’s plan doesn’t reflect the large recumbent in the foreground.

Looking southwest. From this side the arrangement looks reasonably circular.

Langdean Bottom ‘circle’, looking west towards Harestone Down.

The stone row. This is definitely not a natural feature, although dating is another matter.

The northern sarsen arc, looking west.

The northern sarsen arc, less of a true circle than the southern arc, which can be seen beyond.


The southern of two sarsen arcs, six stones that seem to form the side of a pretty good circle.

Landscape context from the Ridgeway, and an attempt to show the “features”.

Adam’s Grave silhouetted on the skyline. Seen from the Ridgeway to the north, near Knap Cottage.

Round barrow at SU1162464076, one of the group to the southwest of Knap Cottage. The lumps and bumps immediately beyond on either side are a later enclosure. A further round barrow is just visible directly over the top of this one, near the trees. The single sarsen that is probably Knap Cottage stone is near there. Milk Hill, the highest point in Wiltshire, forms the skyline behind.

Single large recumbent sarsen, within 100 yards of the grid ref given for the stone in the SMR near a group of round barrows west of Knap Cottage. Adam’s Grave long barrow can be seen on the skyline.

Looking across one of the group of barrows below Adam’s Grave at SU113637, towards Knap Hill.

Looking from the long barrow to Knap Hill.


Small Bronze Age round barrow just below the Neolithic enclosure, in the foreground. Over in the distance to the right of shot, various round barrows can be seen in the field next to the carpark and on the sloping field above.

Bronze Age round barrow inside the Neolithic enclosure.

Looking towards the superbly sited Adam’s Grave long barrow.

Looking east from the Neolithic camp along the edge of the downs escarpment. The Giant’s Grave Iron Age promontory fort can be seen at the far end of the hills.

The southeastern side of the camp, with the Vale of Pewsey stretching away below.

Looking down from the Neolithic earthwork to the dry valley below, with Golden Ball Hill on the left.

Later earthworks to the northeast of the Neolithic camp, the earthwork of which rises behind.

The isolated and unrecorded round barrow on Golden Ball Hill, looking out over the Vale of Pewsey.

Single isolated round barrow on Golden Ball Hill, although there’s nothing on the SMR it’s pretty unmistakable. Adam’s Grave long barrow can be seen in the distance on the right.

Earthworks climbing the southeastern slopes of Golden Ball Hill.

Draycott Hill is on the left, the barrows are on the sloping ridge. Behind that in the centre is Huish Hill (prehistoric earthworks) and to the right of centre is Giant’s Grave promontory fort. Seen from Golden Ball Hill to the west.

Looking across the disc barrow towards Pewsey.

The silted ditch of the disc barrow.

The fine disc barrow at the southern tip of the group.

Bowl barrow 609 and the Vale of Pewsey.

The “conjoined” barrows in the centre of the group. Giant’s Grave promontory fort occupies the darker hill, directly ahead, Huish Hill with its earthworks is over on the left.

The easternmost bowl barrow in the group.

Bowl barrow 605, looking southwest towards Picked Hill.

The pair of bowl barrows at the northwest of the group.

Looking towards the various western earthworks, from the west. There is a linear bank behind the trees to the left, another running left to right across the shot and a longer, lower bank running up the hill on the right. It’s unlikely that these are all contemporary.

North-south running bank and ditch at the western end of the western earthworks.

Well-preserved bank of the western earthworks.

The square northwest corner of the central enclosure.

The northern bank of the central enclosure.

The eastern side of the central enclosure.

Adam’s Grave stands prominent at the lefthand end of the escarpment. Seen from Huish Hill a few miles to the east.

The eastern earthworks, looking west.

The eastern linear earthwork on Huish Hill, looking east towards Martinsell hillfort.

The promontory fort from the WNW, on the footpath up Huish Hill from Oare. The earthworks are at the lefthand end of the summit.

Silbury before a cloudy Midwinter sunset, from Waden Hill.


