
Dragon Hill as seen from the crossroads of Dragonhill road and the Icknield Way
Image credit: Chance - 2009
Dragon Hill as seen from the crossroads of Dragonhill road and the Icknield Way

A view of the vegetation surrounding the nearest of the Woolstone Wells to the Icknield Way.

View of a barley visible White Horse, as seen from the Woolstone Wells. The contour line just above the ash tree is the Icknield Way itself and shows how the road has been engineered in a loop around the Woolstone Wells.

The Icknield Way as it bends and twists around Woolstone Wells. This shot emphasizes the stretched out White Horse on the hill side

The Icknield Way as it bends and twists around Woolstone Wells with a barley visible White Horse on the horizon

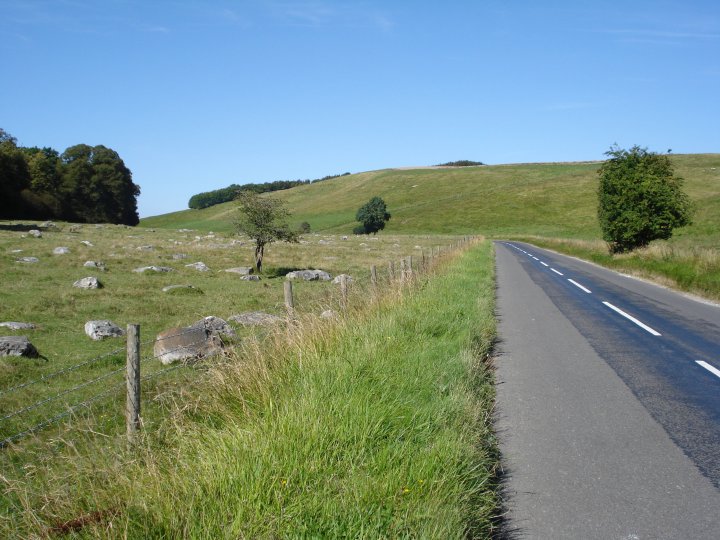
The Icknield Way looking east towards Uffington Wood with a barley visible White Horse on the horizon

View of the Avenue as it crosses the A344 in front of Stonehenge.
Note the Heel and Slaughter Stones and the position of the entrance turnstile.
Stonehenge had been enclosed in 1901 and a turnstile installed with an entry fee of a shilling per head.


Plan of Fargo henge after Stone.
The central area of the henge shows the pit containing the burial and cremations, together with the position of the beaker and base of the food vessel. Secondary cremations are shown by the pits labelled A to D.

Arial view of the iron Age hillfort on Nash Hill c.1980’s.
On the left is the road from Derry Hill/Sandy Lane and on the right is Nash Hill Farm with the road descending sharply into Raybridge. The Eastern remains of the single bank and ditch are seen as a dark mark spread out across the promontory. The pits shown on the right of the picture and below the promontory of the fort are the remains of ironstone mining and smelting. This area may have been in use, at one time or another, since the early Iron Age.

The ‘laughing well’, ‘boiling well’ or the Broad Well, a natural spring where you can see bubbles constantly rising up from the bottom.

The ‘laughing well’, ‘boiling well’ or the Broad Well, a natural spring where you can see bubbles constantly rising up from the bottom.


View of the stone row behind All Saints church

View of the stone row behind All Saints church

It is easy to miss this barrow, which is orientated north west – south east, is up to 1.1m high, 46m long and c.16m wide.

Although much reduced in height, this is one of at least nine Long barrow which survive in the Stonehenge area.


The area listed as the location of the long barrow

One of the later bronze age round barrows, built on the same site.
A mark of constant cultivation and worship of this area of land.

One of the later bronze age round barrows, built on the same site.
A mark of constant cultivation and worship of this area of land.

Flanking ditches, from which material used to construct the mound was quarried, run parallel to the north and south sides of the mound. These have partly infilled over the years but survive as earthworks 5m wide and 1m deep on the south side and 6m wide and 1.5m deep to the north. These stand out by the different wild growth, nettles and on the barrow, cow parsley.

Tow Barrow is set below the crest of a west facing slope in an area of undulating chalk downland on the edge of a field sown with barley.

Tow barrow survives as an earthwork orientated SSW-NNE 1.5m high

View showing the barrow in context to the surrounding hillside

The northern ditch adjoins the barrow mound and is 7m wide and 0.75m deep.


View of the south ditch which is separated from the mound by a narrow berm 2m wide is 9m wide and 1.5m deep.

An area on the top of the barrow has an uneven surface which may suggest partial excavation of the site, probably in the 19th century.

An area on the top of the barrow has an uneven surface which may suggest partial excavation of the site, probably in the 19th century.

View of the north ditch which has silted up over time

View of the south ditch from the top of the barrow

The barrow is well protected and access is provided by gates

View showing the height of the barrow and its compound. The barrow survives to a length of 41.5m, is 20m wide and 2.5m high at the higher east-end.

Overall view showing the gates to access to the long barrow and the fenced off area in which it sits

A stone sample from the Ashdown drift showing the characteristic red form found from this source.

The original boundary of the sarsen drift became the boundary for the Park Pall in the medieval ages and since 1974 now becomes the border between Oxfordshire and Berkshire.

The original boundary of the sarsen drift formed the Park Pall and since 1974 became the border between Oxfordshire and Berkshire.

The North ride showing the formal 17c. planting over the ancient bronze age field systems. P51 Mustangs took off and landed on this strip during 1942 when the house became home to members of the 3rd Photographic and 67th Observation and Reconnaissance Groups of the USAF before being stationed at nearby Membury airfield.
This photo has been moved to the inappropriate/irrelevant images section as there is little or no visible prehistoric content.

Sarsen Field and Weathercock Hill as viewed from the roof of Ashdown House. Although some of the fields around the Sarsen drift were under cultivation in ancient times, Sarsen field seems to have been largely untouched until the building of Ashdown house in the early 1660’s.
This photo has been moved to the inappropriate/irrelevant images section as there is little or no prehistoric content and the majority of the image is of bits of a house and its grounds.

Sarsen Field with Ashdown House in the background. The Oak trees are the result of the 17C. planting scheme.

Sarsen Field showing the remnants of the remaining stones.
Sarsen Field as seen from the B4000

The round barrow, 1km directly east of Ballard’s Copse Long barrow, shows the same orientation and may have been built by the descendants of the previous Neolithic farmers.

The view looking south from Ballard’s Copse Long barrow

A slight bump in the field is all that can now be seen of Ballard’s Copse Long barrow

Part of the bank and ditch on the southern flank
