
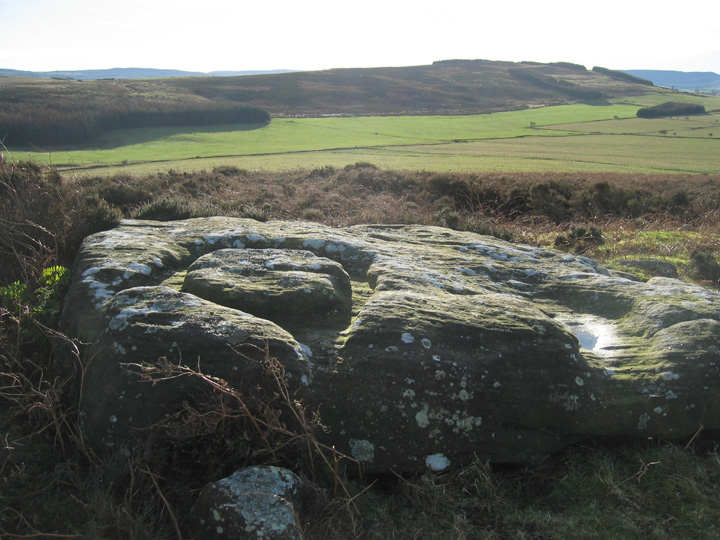
Beanley Moor 2. Cup marked boulder built into a boundary wall just W of Ringses Camp, visible beyond.
Image credit: Rockandy
Beanley Moor 2. Cup marked boulder built into a boundary wall just W of Ringses Camp, visible beyond.

The Ringses Camp, Beanley Moor. View NW up the valley of the River Till with the escarpment of Bewick and Harehope rising up on the right hand side.

The Ringses Camp, Beanley Moor. View W to Cheviot.

The Ringses Camp, Beanley Moor. View NE towards Eglingham, the ramparts of the Camp in the foreground to the right.

Hunterheugh 1. View SW from the outcrop towards the Settlement. Cup-marked rock and large quarried slabs visible in the foreground. Trees on the slopes of Titlington Pike are prominent in the distance.

Hunterheugh 1. Landscape view to the SSE of the excavated outcrop. The Bronze Age burial cist was located in a fissure created by movement of large quarried, cup-marked slabs in the centre of the outcrop. A dispersed cairn was removed during the excavation. Cup and ring motifs are visible on the nearer rock surfaces.

Hunterheugh 1. View SE from cup and ring marked outcrop. The sea is just visible in the far distance.
Massively carved outcrop near the Settlement at Hunterheugh Crags. Possibly, more ‘kitchen utensil’ than ‘rock-art’.

Massively carved outcrop near the Settlement at Hunterheugh Crags. Possibly more ‘kitchen utensil’ than ‘rock-art’.

Location of rock basin W of ruin on Jenny’s Lantern.

Large, carved rock basin near the hill top (NU 11847 15321). I wouldn’t like to guess at the archaeology but it appears to be on the edge of a rock-built platform of some kind of structure.

View N from hilltop of Jenny’s Lantern towards the Hunterheugh area with its many panels of rock-art.

Midstead 2. Close-up of cup-marked panel. View SW.

Midstead 2. View SE from cup-marked panel towards Cloudy Crags above Alnwick.

Midstead 2. Many cups on the flat surface of an outcrop.

Midstead 5. Stan B. sees 9 cups, some pairs linked by grooves. I’m not sure I could interpret it in the same way but clearly something going on!

Midstead 1. View S from the carved panel across the River Aln. Lamp Hill and Corby’s Crags just visible on the far horizon to the right.


Hunterheugh 1. View form the outcrop S towards the Tittlington Burn and the hills of Jenny’s Lantern. The outcrop was carved, quarried, some surfaces adorned with newer carvings (including the double figure visible in the foreground) and surmounted by a cairn and burial cist during the Bronze Age. A natural rock basin contains water at the back. There is an extensive view from the site; from the hills to the W, to the valley of the Eglingham Burn (which joins the River Aln at Alnwick) and the coast to the E.

Hunterheugh 1. Cup and ring marked rock with strings of cups linked by grooves running down the rock surface, probably representing the early phase of rock carving at the site. This surface was illustrated by Stan Beckensall (2001) as Hunterheugh 1b. There is a cluster of cups on the higher (right) side. Linked cups run down the slope of the rock towards an heavily eroded cup with a faint double ring and a deep cup surrounded by a faint ring partly made up from an arc of small cups on its left-hand side. An arc of three cups runs towards the eroded motif from a higher boss of the rock surface, each cup getting shallower and equally spaced.

Hunterheugh 1. Small punch marks are found on parts of the same outcrop. Other groups of similar markings are also present. What is their significance and are they from the same period as the rock carvings or were they made in more recent times. The patterns don’t appear wholly random and look very fresh.

Hunterheugh 1. Heavily eroded cup and ring motifs from the earliest phase of rock carving, some of which was subject to later quarrying. Some of the quarried surfaces were adorned in a later phase of carving with new and more crudely-made motifs before being covered by a burial cairn dated to the Bronze Age.

Hunterheugh 1. N’most of the two motifs shown in a previous photograph and illustrated by Stan Beckensall as Hunterheugh 1d. The figure has two cups around which a freshly-pecked, shallow groove winds getting fainter to the W (right) side where it appears to end in a weakly-made rectangular shape. The motif was, before excavation, partially covered by a dispersed Bronze Age cairn.

Hunterheugh 1. Southerly of the two motifs shown in a previous photograph and illustrated by Stan Beckensall as Hunterheugh 1d.

Hunterheugh 1. Heavily eroded cup and ring motifs probably from the first phase of rock carving at this site. The figure on the left has a cup surrounded by two closed, pennanular rings; that on the right has a faint, pecked groove running down the rock surface. Other, eroded cup and rings can be seen above. A similar photograph appears in the British Archaeology article linked from the Beckensall Archive site.

Hunterheugh 1. Two large motifs delicately picked on a previously quarried rock surface and partially covered by the Bronze Age cairn removed during excavation. Both motifs are arranged in the same direction showing some similarities but also clear differences in design. That on the left (N’most) is much finer with a faint serpentine groove showing many individual pick marks and apparently incomplete. A prsistine but weakly made cup and ring can be seen above the left hand figure and more heavily eroded (?older) motifs on the rock surface below.

Hunterheugh 1. A deeply hacked cup and ring motif uncovered by excavation in 2004. It is interpreted as being from the second phase of rock carvings on the outcrop, made on a previously quarried surface where older carvings may have been removed. Pick marks are clearly visible in the deep cup, inner and partial-outer rings.

Situation of the large (possibly cup-marked) boulder situated on the N bank of the Fallowlees Burn (NZ 01277 93129). View from the bridle-path on the S side of the valley with the rock just below centre of the photograph, close to the forest edge.

Group of three ?cup marks on the top surface of a prominent, rounded boulder situated on the N bank of the Fallowlees Burn close to the edge of Harwood Forest (NZ 01277 93129). There are probably natural erosion features. The rock must be in its natural position and in winter hardly catches sunlight in the depths of the stream valley.

Large perched boulder on the N bank of the Fallowlees Burn close to the edge of Harwood Forest (NZ 01277 93129) with two groups of possible cup-marks.

A new cup-marked rock from the area S of the Fallowleas Burn. The small rock lies within the rectangular improved field at approximate grid reference NZ 917 932, close to the bridlepath.

Fontburn d; view E from cup-marked boulder (in site of denuded cairn) towards the site of another cairn and Fontburn Reservoir. The main cup-marked rock (Fontburn b) is adjacent to the conifer plantation on the far right.


View NE towards Alnwick from the Millstone Burn rock-art site.
Photo taken 05/03/2004

View S towards the Simonside Hills from West Hills Fort, Thropton. Ditches of the Iron Age Hillfort are in the foreground. Phot taken 06/02/2004.

View N towards Cheviot from West Hills Iron Age Hillfort, Thropton
06/02/2004


I took this in February 2004 at West Hills Cairn and took it to be modern vandalism? Stan and Aron were baffled – see posted link.


This photo was taken in February 2004 from a location on Chirnells Moor. The nearest match I can find from the position I remember, and by comparison of images in the Beckensall archive, is to the panel, Chirnells h.

Chirnells Moor n; a cup and ring marked boulder almost hidden in the heather just NE of the wall bounding the main Chirnells site, SW of Football Cairn.

Can’ t add much to the pictures already posted of this marvellous site but felt we had to record the prehistoric Ministry of Works sign that provides interpretation. We perhaps won’t be able to read it for much longer and it might (should) be replaced with something much more worthy of this, one the best sites of rock art in the country. The markings are clearly very susceptible to wear and environmental damage.