
Taken 6th August 2004: Viewed from above, with the southern end of the stone nearest the camera.
Image credit: Simon Marshall
Taken 6th August 2004: Viewed from above, with the southern end of the stone nearest the camera.

Taken 6th August 2004: This is Stone 10 viewed from the west with the A859 and Creed Lodge in the background.

Moon over stone 29. From a photograph taken on 6th August 2004.

Taken 6th August 2004: The beige arrow indicates a possible cupmark on stone 29 (the central stone) as identified by Margaret Ponting *.
The black mark above it is a small lumps of green-horn, a naturally occurring feature of Lewisian gneiss.

Taken 21st June 2005: The Summer Solstice sun tries to break through the cloud.
The hill on the horizon to the left of the frame is Pumlumon.

Taken 6th August 2004: Cnoc Sgeir na h-Uidhe, with Calanais indicated by the red arrow.

Taken 6th August 2004: Louise (5ft 6) standing next to Cnoc Sgeir na h-Uidhe. This shot is taken from the the south (approximately speaking).

Taken 6th August 2004: Calanais as seen from Na Dromannan to the north east.

Taken 6th August 2004: As far as I can gather this is the alleged quarry where the stones for Na Dromannan, and possibly some of the other sites were sourced. It’s just to the west of Na Dromannan.
Louise is in the photo for scale.

Taken 6th August 2005: One of the southerly stones, with Louise (5ft 6) providing an indication of scale. Behind Lou’s head is the village of Callanish.

Taken 6th August 2005: Looking approximately south west across the site.
The stone that I interpret as the most south easterly can be seen to the left of the frame. In the distance to the right some of the houses of Callanish village are visible.
Note the weathering on some of the stones indicating the modern ground level prior to excavation.

Taken 6th August 2005: The stone at (what I think is) the south eastern edge of the site, looking approximately south west towards Loch Ceann Hulabhig.
The big pile of peat is spoil from the Manchester University archaeological dig.

Taken 6th August 2005: There was no way I was going to make these photos stitch together in a tidy way, so I decided to make it really obvious where the joins are. This way I’m not passing off a distorted image as the real thing.
The photos were taken from the top of the spoil heap to the south of the site. The village of Callanish is just about visible under the red line on the far left (above the green wheelbarrow).

Taken 5th August 2004: Looking approximately north up the coast.
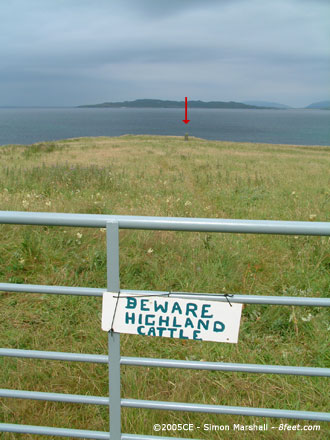
Taken 5th August 2004: Testing your commitment to experiencing Scotland’s heritage.
The cattle are lurking just off to the right. The red arrow indicates the stone. Do you run or walk?

Taken 5th August 2004: The welcoming committee, with Sgarasta in the background.

Taken 5th August 2004: Coir Fhinn viewed from the south (please ask for permission before entering the garden).

Taken 5th August 2004: Coir Fhinn viewed from the south east (please ask for permission before entering the garden).
The road in the background is the A859.

Taken 5th August 2004: Clach Mhic Leòid viewed from the north east, with Gob an Tobha (Toe Head) in the distance.
I’ve no idea what William thinks he is (some sort of super hero I’m guessing) but for the purposes of scale, he was 108cm tall at the time.

Taken 5th August 2004: Clach Mhic Leòid viewed from (very approximately) the south west.

Taken 3rd August 2004: Clach Stei Lin viewed from the village of Siadar Uarach to the north west.

Taken 3rd August 2004: Clach Stei Lin from the north west.

Taken 3rd August 2004: Viewed from the south east, here is (or should that be ‘are’) Clach Stei Lin. In the distance is the village of Siadar Uarach.

Taken 3rd August 2004: These masked extremists are archaeologists from Manchester University undertaking a Geophysical survey of the field to the south west of Clach an Trushal. The masks are to ward off midges, mosquitos and other horrid insects that might be lurking in the grass.

Taken 3rd August 2004: Clach an Trushal viewed from the south east. To the right of the photo in the field to the north east of the stone are archaeologists from Manchester University undertaking a survey of the site.

Taken 3rd August 2004: The largest stones with Louise (5 ft 6 inches) alongside for scale.

Taken 3rd August 2004: Here’s a panorama of the ‘cairn’ at Steinacleit, looking north west over Loch an Dùin (note Loch An Duin Dun in the background).
I nearly posted this up as ‘Artistic/Interpretive’ because I’ve had to do a lot of tweaking in Photoshop to stitch the three photos together. In other words, bear in mind that some jiggery pokery has taken place.

Taken 2nd August 2004: The stone as viewed from the lane. The trailer has been placed in a way that obscures it from view from slightly further south.

Taken 2nd August 2004: The stone from the north east. In the field behind (on private property) lies another stone, now fallen.

Taken 2nd August 2004: The stone from the south, showing recent vandalism (presumably perpetrated by children based on the size of the hand prints).

Taken 2nd August 2004: The stone viewed from the north. The red arrow indicates the location of the Calanais stones.

Taken 3rd August 2004: Looking approximately south, with Cealagbhal (Port Nis) just visible to the left of the larger stone.

Taken 3rd August 2004: Looking approximately south east (I think).

Taken 3rd August 2004: There’s not much to be seen inside the bunker. It’s tempting to speculate that the rocks represent something of the souterrain, but probably not the wire.

Taken 3rd August 2004: This is the exterior of the ‘site’. Essentially all that can now be seen is the Second World War bunker.

Taken 2nd August 2004: Presumably the top of this stone has “come orf”.

Taken 2nd August 2004: One of the stones on the southern side of the circle. Nine years after my last visit I ended up photographing the same stone!

Taken 2nd August 2004: The most easterly stone, lovingly set in concrete.

Taken 2nd August 2004: The most southerly stone, now precariously close to the edge of the cliff.
This shot is taken looking west with the stretch of water called Sruth Iarsiadar visible behind the stone.

Taken 2nd August 2004: The two northerly stones viewed from the west, with Loch Barraglom in the background.

Taken 2nd August 2004: The view of the Iarsiadar Standing Stone from the Bernera Bridge ‘Circle’. The road cutting to the west of the stone is where it previously stood.

Taken 2nd August 2004: Modern packing stones at the foot of the standing stone. Very tidy!

Taken 2nd August 2004: Viewed from the north, here is the beautifully re-erected Iarsiadar Standing Stone.

Taken 2nd August 2004: The stone with the mushrooms growing at the foot of it.

Taken 2nd August 2004: Mushrooms growing at the foot of one of the stones.

Taken 2nd August 2004: The stone with a jigsaw puzzle top. You can make out the depression that marks the inside circumference of the circle (presumably the result of relatively modern turf cutting). I’ve no idea what the stones in the foreground are.

This plan of Achmore is displayed on the information board to the south of the circle. Without it, the site would be very difficult to enterpret.

Taken 1st August 2004: Not a great shot as far as megaliths go. The stone visible in the shot is one of the, “possible packers exposed by peat cutting in the early 1990s”.
The main reason I’ve posted this photo is that it gives a good indication of the height of the peat in the uncut part of the circle.

Taken 1st August 2004: One of the excavated stones in the area where the peat has been cut.
This one is almost too good to be true. Three socket stones are in the bottom right quarter of the shot. The match between the stone and the socket is remarkably obvious.

Taken 1st August 2004: The tip of one of the buried (and water-logged) stones in the area where the peat hasn’t been cut.