
Looking WSW. There is evidence of packing at the base of the stone, which might otherwise pass for a naturally occurring boulder.
Image credit: A. Brookes (27.9.2013)

Looking WSW. There is evidence of packing at the base of the stone, which might otherwise pass for a naturally occurring boulder.

The stone sits towards the southern end of the Llorfa ridge, on a gentle slope with a boggy area to the south and west. This picture is taken on the approach from the relatively dry ENE, after a damp crossing of the Gwys Fawr.

Small stoney mound close to the Cwm Fforch-wen cairn, which looks like it may be a clearance cairn (Coflein is silent).

The large (1.5m long) slab on the southwestern side of the Cwm Fforch-wen cairn.

The less than impressive Cwm Fforch-wen cairn, notable chiefly for the large slab on the SW side of the cairn. Cribarth can be seen on the right skyline.

In stark contrast to the plunging cliffs of the northern aspect of Y Mynydd Du, the view from the south is one of gently rounded slopes. Picws Du rises centre skyline, the viewpoint is Cwm Fforch-wen, looking up the Gwys Fawr.

Landscape context for the group of monuments, from near the Cwm Fforch-wen cairn, across the Gwys Fawr to the southeast. I’m not sure, but the higher ridge on the left appears from the OS to be crowned by a further cairn.

The curving band of rock immediately north of Llorfa round cairn, mentioned in the Coflein record.

Looking south towards be-cairned Mynydd Allt-y-grug. Note earthfast boulder on the northern edge of the cairn.

Llorfa round cairn, looking roughly east towards Cribarth, the top of which is visible above the trees of Giedd Forest.

Llorfa round cairn peaks out from the tussocky grass. Immediately beyond is the stone band mentioned in the Coflein record. The ridge on the left is Llorfa itself, location of a mini-megalithic complex.

One for a daylight revisit.

I stumbled across this large hut circle while on my way off the moor in near dark.

Large sub-circular feature near the summit cairn. It appears to have a kerb of stone and cairn-looking material fills the centre, which is unfortunately badly trampled by cattle.

The summit cairn. An apparent footprint can be made out around the base, although it was quite dark so I can’t confirm. The rocky tops of Sharpitor, Leather Tor and Sheepstor (near Yellowmead circle) can be seen on the left skyline.


Approaching the mutilated summit cairn. It was getting quite dark by this time.


Twilight, Ringmoor Down.

The end of the row (entering pic bottom right) and the terminal cairn circle.
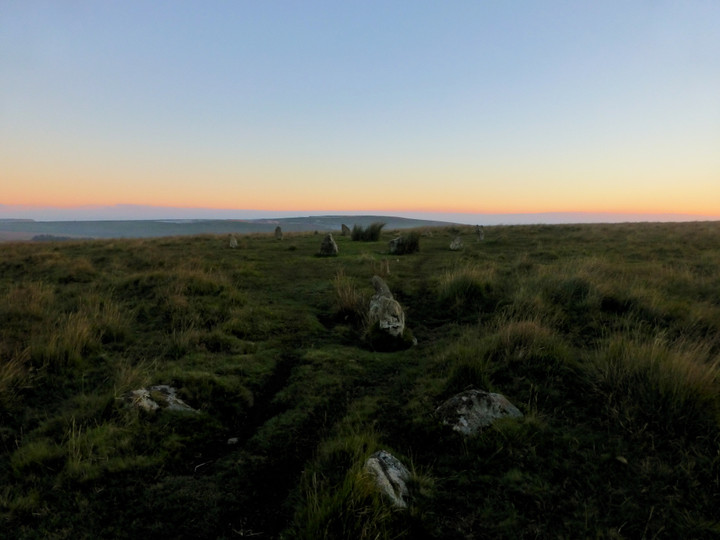
Looking along the row to the terminal cairn circle.

Ringmoor Down, just after sunset.

Post-Equinox sunset, Brisworthy.


The most easterly stones turn their faces towards the last of the sunshine.

South across the china clay works to Saddleborough, another hill covered in prehistoric remains.

Looking SE towards (I think) Great Trowlesworthy Tor, clustered about with its own circles and rows.

Towards Legis Tor as post-Equinox sunset approaches.

We arrive 15 minutes and 9,000 years too late. The water is already reclaiming the stumps.

The fort from below, showing both the outer rampart and raised inner enclosure. The base of the cliff below the fort is riddled with caves – surely there must be a secret way in?

The striking profile of the fort from the shore to the SW.

The steep and gorse-covered western flank. The outer rampart can be seen at the top of the slope, the inner enclosure is hidden from view.

Looking down on the shoreline from the western flank of the fort.

The fort is swathed in a thick coat of gorse, preventing access to the inner enclosure from the coast path, as far as we could find. The western flank (pictured) is very steep, with a zig zag band of scree below the outer bank.

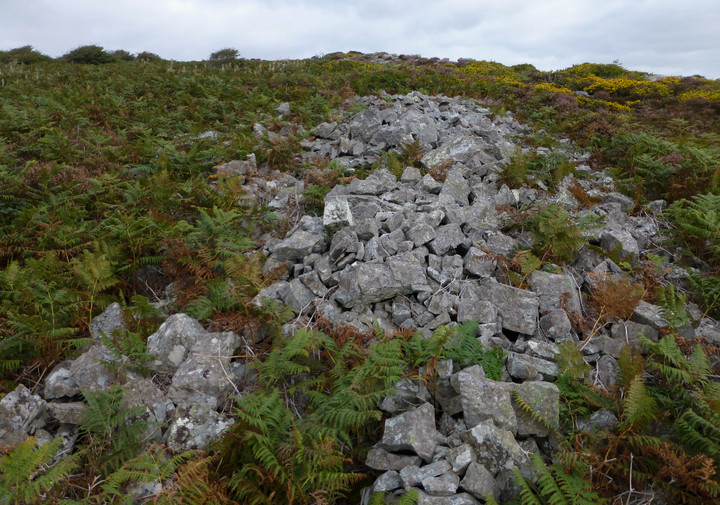

The southern end of the mound, looking down on Marros Sands.

Looking SSW along the long mound.

First sight of the cairn, looking SSW towards Caldey Island and Tenby.

Morfa Bychan A, showing the orthostats of the chamber, no longer supporting the slipped capstone. Pembrokeshire beckons in the background.

Morfa Bychan A, the most seaward of the group.


Morfa Bychan B, with A down the slope on the far left. The distant island on the horizon is Caldey, near Tenby off the Pembrokeshire coast.

Morfa Bychan B, with dismounted capstone on the right.

Morfa Bychan B, looking SE towards a smudgy Gower and Worm’s Head.

Morfa Bychan B, looking north towards the rock stack (Morfa Bychan C is at the foot of the stack, but not visible in the bracken).

Morfa Bychan C, looking east towards Gilman Camp cliff fort.


The wrecked Morfa C lies forlorn and nearly buried in bracken below the cliff. The viewpoint is next to Postie’s rock stack.