
Fauldinchie W Burnt Mound viewed from N.
Image credit: Mark Johnstone

Fauldinchie W Burnt Mound viewed from N.

Fauldinchie W Burnt Mound viewed from E.

Fauldinchie W Burnt Mound viewed from S.

Fauldinchie W Burnt Mound viewed from W.

Summit of Fauldinchie W Burnt Mound viewed from N.

SSE Hollow of Fauldinchie W Burnt Mound viewed from NNW.

NE Crescent of Fauldinchie W Burnt Mound.

Stream adjacent to Fauldinchie W Burnt Mound.
Fauldinchie W Burnt Mound on Canmore
Visited 05.05.22
Fauldinchie W Burnt Mound is on the edge of marshy ground c. 70 yards of the Southern Upland Way path c. 200 yards E of its junction with the public road. The round mound is c. 12 yards in diameter and 1 yard high with a hollow in the SSE slope. Canmore ID 61585 (go to Links) states there is a raised crescent on the NE Arc of the mound.
Directions: At the S edge of New Luce, beside the church, take the un-signposted turn up the hill. Stay on this narrow lane for c. 1.1 miles until you reach the sign for the Southern Upland Way (SUW) at NX19106500. There is room to park here. Follow the SUW path for c. 200 yards to reach a stream. Follow the W bank of the stream heading N for c. 70 yards over rough boggy terrain to find Fauldinchie W Burnt Mound.

Enclosure of The Thieves Standing Stones viewed from NW.

NW Arc of Enclosure of The Thieves Standing Stones.


S Face of NE Stone of The Thieves Standing Stones.

NW Face of SW Stone of The Thieves Standing Stones.

Recumbent Stone half-buried between The Thieves Standing Stones. It is c. 5 ft long on a NNW-SSE Axis (walking stick set to 1 yard for scale).
Visited 07.05.22
Blair Hill (The Thieves) Standing Stones are erected in moorland c. 600 yards NW of Nappers Cottage on Drannandow Moor. According to Canmore ID 63579 (go to Links) the stones could be the remains of a stone circle. However, there is only one substantial stone in the immediate vicinity of the stones. A half-buried stone slab on its narrow edge, orientated on a NNW-SSE Axis lies between the stones. It’s narrow edge tapers from c. 4 to 3 inches wide. Using my walking stick as a probe, it extends underground from the top and bottom of the visible portion to at least 5 feet long. The impressive stones lie on the SE Arc of a round turf enclosure said by Canmore to be modern.
The Thieves (Blair Hill) Standing Stones on Canmore

Cup Marks on a Recumbent Stone c. 80 yards SW of Tom Nan Carragh W Stone

Cairnharrow Cup & Ring Carved Stone viewed from E.

Cairnharrow Cup & Ring Carved Stone viewed from E.

Cup & Ring Carving on Cairnharrow Cup & Ring Carved Stone viewed from E.
Cairnharrow Cup & Ring Markings on Canmore
Visited 11.03.17
This stone is listed as Canmore ID 63668 (go to Links).
It is a moss covered stone with a large worn ring mark and several cup marks visible in its current state. Canmore lists more ring marks but I didn’t remove the moss to look for them.
Access to the site is by climbing up the slope of Cairnharrow for about 0.5 mile across rough ground or by a longer detour from Cambret Hill.


Possible Kerb Stone on E Arc of Cambret Moor Cairn.


Stone Setting in NW Arc of Centre of Cambret Moor Cairn.

Exposed Cist in S Arc of Centre of Cambret Moor Cairn.

Interior of Exposed Cist in S Arc of Centre of Cambret Moor Cairn.
Cambret Moor Cairn on Canmore.
Visited 27.04.21
Cambret Moor Cairn is a round cairn measuring c. 7.5m in diameter and 0.5m in height according to Canmore ID 90631 (go to Links). It has been almost entirely robbed out, leaving a footprint of moor grass which is almost invisible in the rough moorland. There is a large stone on the perimeter of the E Arc, possibly a kerb stone and a rough circular hollow c. 2m across in the centre of the cairn. A small stone setting remains on the NW Arc of the hollow opposite an exposed cist stone in the S Arc of the hollow.
Cairnharrow Summit Cairn on Canmore.
Cairnharrow is c. 3 miles E of Creetown. Creetown Summit Cairn is easily visited via Cambret Hill. Take the R turn 100 yards before the Gem Rock Museum in Creetown signposted for Glenquicken Farm Trout Fishery. After c. 2.5 miles there is a lay-by opposite Glenquicken Stone Circle on the R side. Continue E for c. 1.1 miles to the access track to Cambret Hill mast. There is a lay-by at NX 52645 57987 0.5 miles up the track, just below the Cambret Hill mast. I have plotted a 1.25 mile route S to Cairnharrow Summit Cairn via 3 Cairns, 1 Stone Circle, 1 Cup and Ring Marked Stone and 1 Modern Worked Stone on explore.osmaps.com/route/12211781/cambret-hill-and-cairharrow-cairns?lat=54.887958&lon=-4.308434&zoom=13.2069&overlays=&style=Standard&type=2d.
Visited 27.04.22
There is a robbed out cairn on the summit of Cairnharrow. It is roughly circular, measuring c. 12m in diameter and 1.3m in height according to Canmore ID 90588 (go to Links). There is a modern stone cairn in the centre of Cairnharrow Cairn, presumably constructed from stones removed from the surface of the cairn. The dry stane dyke S of the cairn could also account for the destruction of the cairn. The resulting turf footprint is covered by rough grass with a circular depression in the N Arc.


Modern Cairn on Cairnharrow Summit Cairn viewed from N
Visited 21.04.22
West Cairngaan Stone has been given a spring clean since my last visit in 2011. All of the field clearance stones have been removed leaving West Cairngaan Stone high and dry on a E-W rocky earth plinth. It is visible from the West Tarbet Path which starts at West Cairngaan Farm. Follow the path E then turn S to reach a gate at NX 13093 31346. West Cairngaan Stone is located in an arable field c. 200 yards E of the gateway.

West Cairngaan Standing Stone viewed from N.

West Cairngaan Standing Stone viewed from E.
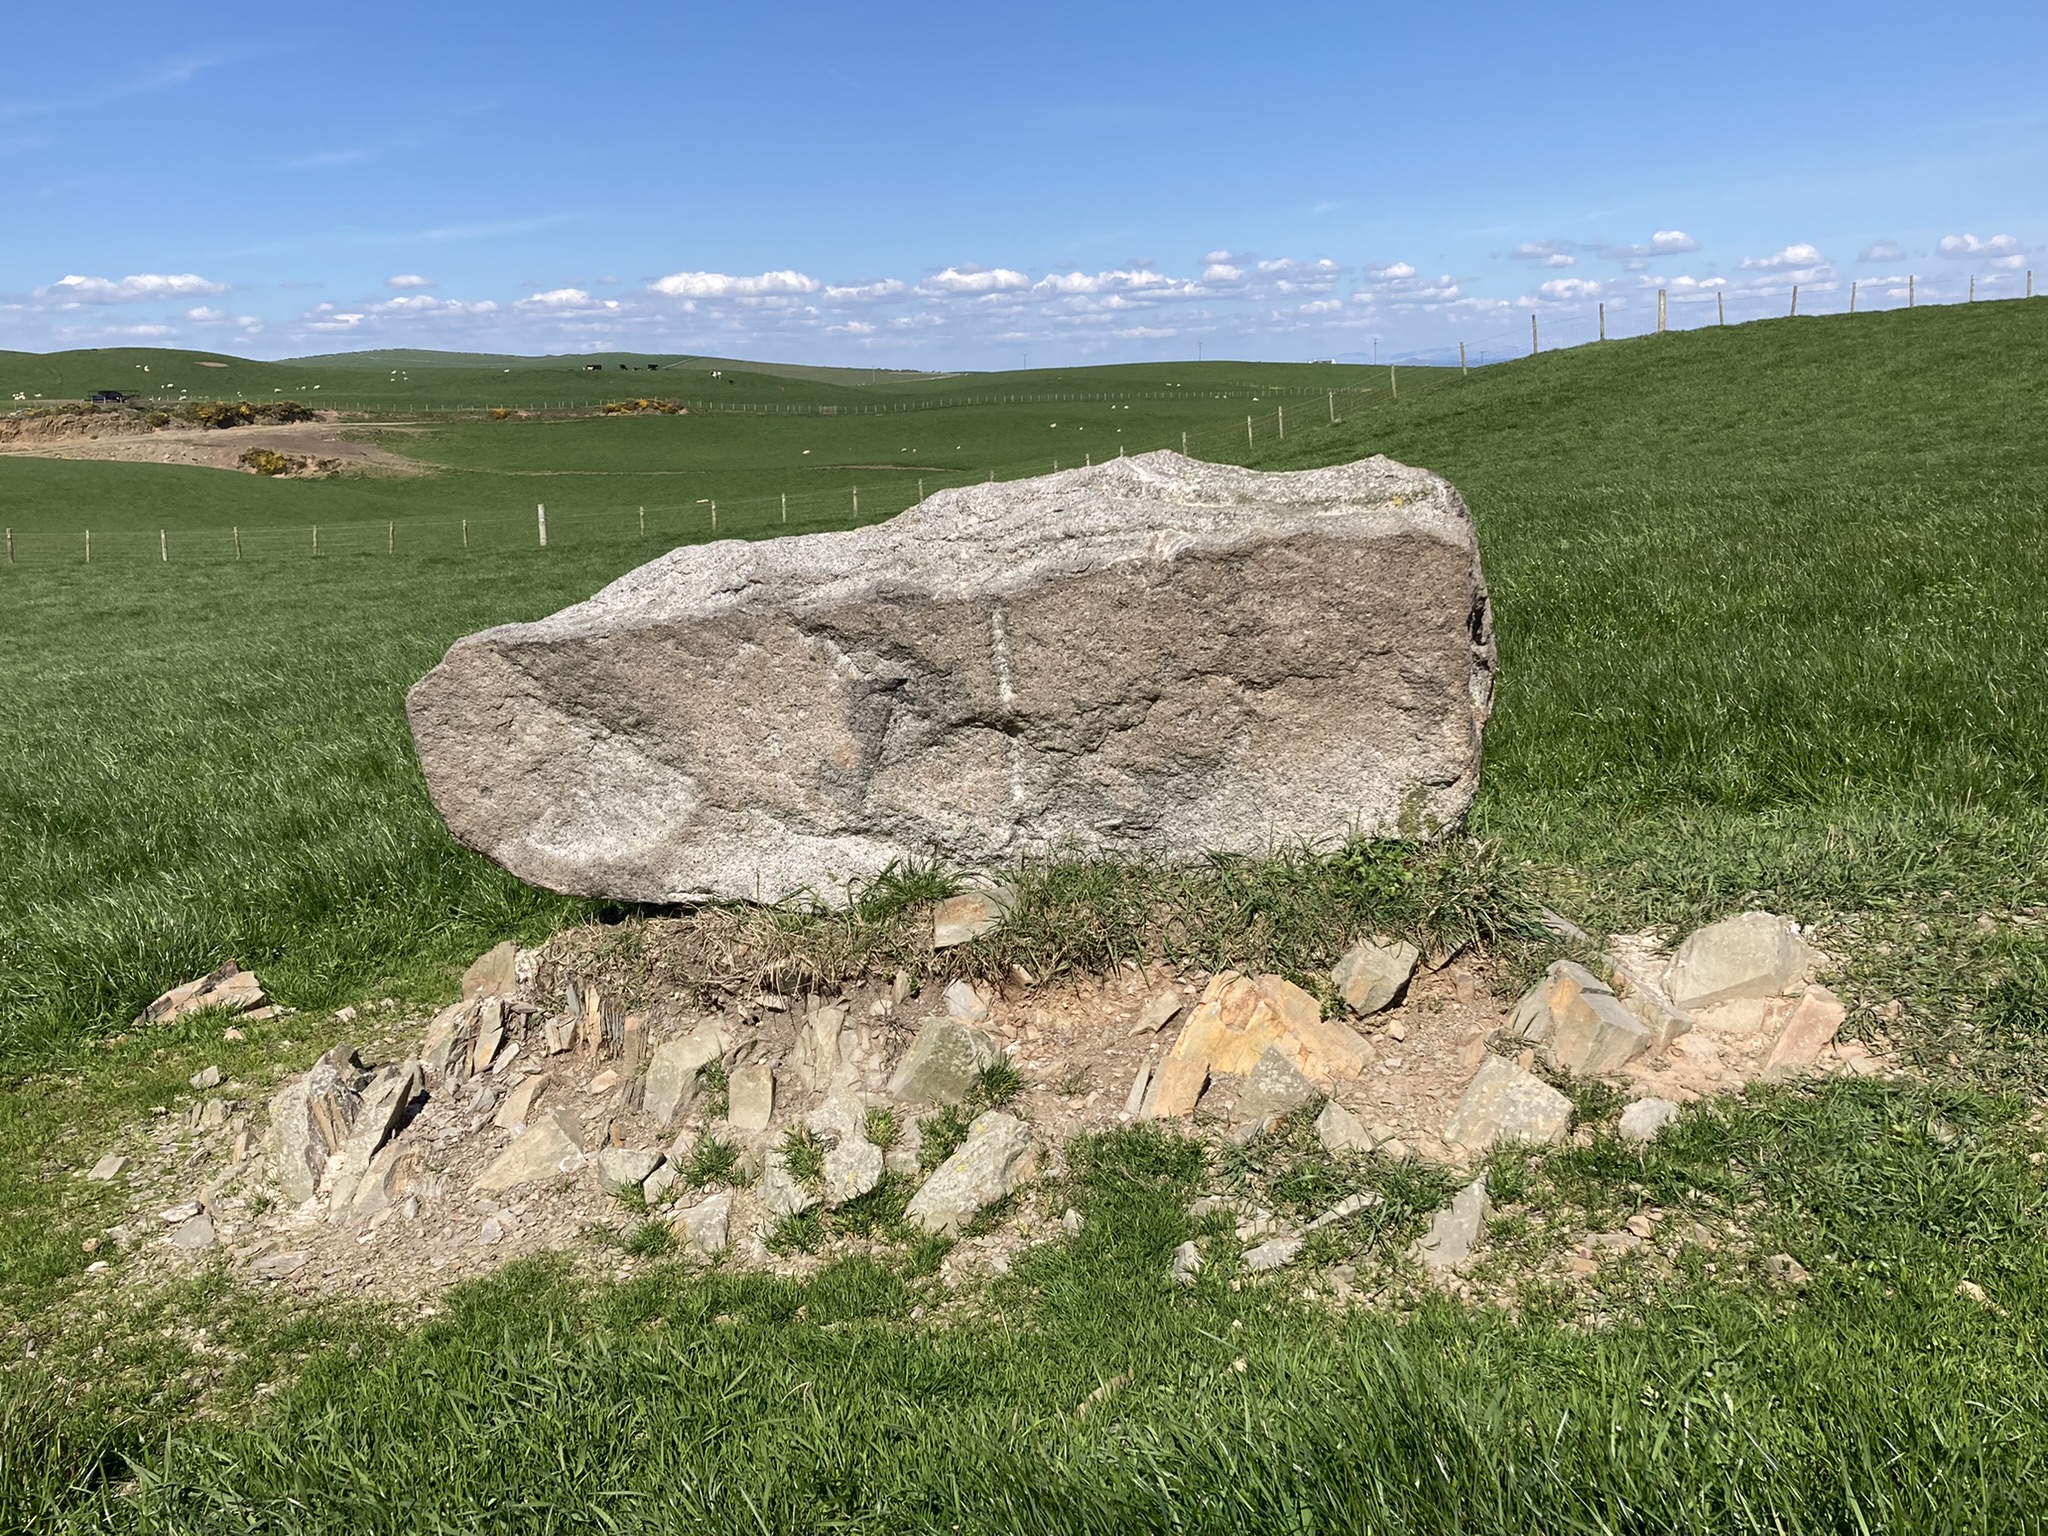
West Cairngaan Standing Stone viewed from S.

West Cairngaan Standing Stone viewed from W.