

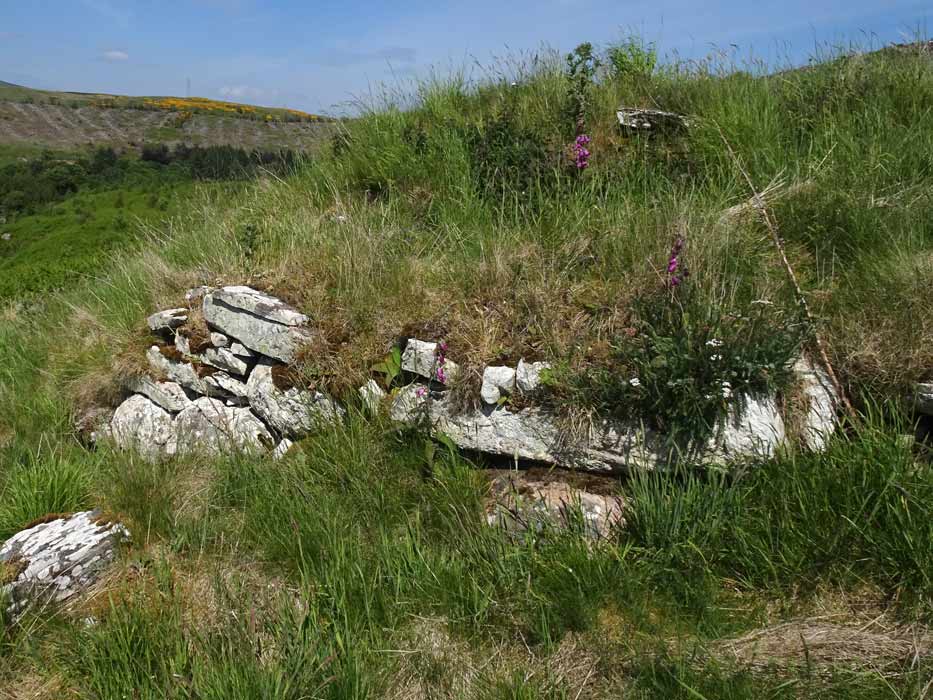
The southwest aspect of Tulach Mor showing the remaining external walling courses.

A close-up view of the main exposed walling courses on the southwest of Tulach Mor.

Some exposed remnant internal walling shows at the top of the broch wall to the north of the structure.

View across the saucer shaped summit of Tulach Mor, which is mainly grassy with just the odd stone peeking out here and there.

View across the shallow saucer-lihe summit of Tulach Mor.

On the inside western wall of Tulach Mor is this exposed lintel leading to an intermural cavity of some sort.

Interior detail beyond the exposed lintel, revealed with a flash exposure.
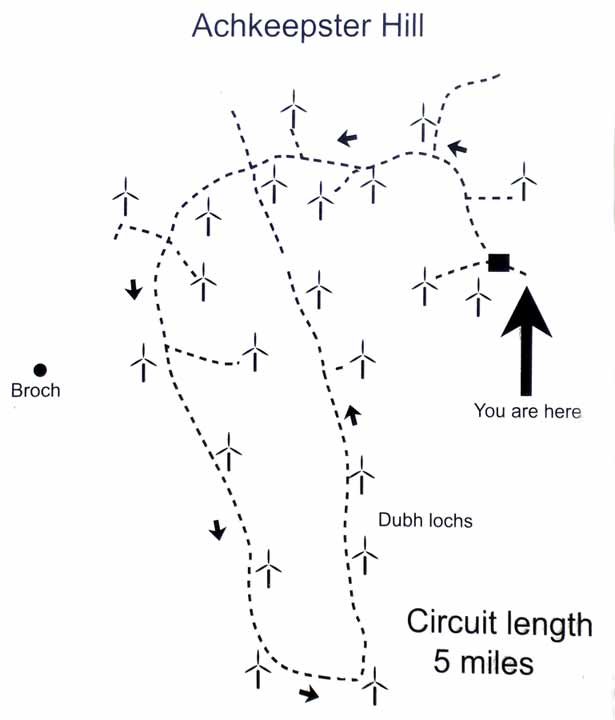
Photograph showing the map of the windfarm. This is located beside the cattle grid at the entrance to the Causeymire wind farm.
The broch illustrated on it is NOT Tulach Mor but the dilapidated Tulach Beag, which is located several hundred metres to the north of Tulach Mor.

The gate and high fence, with slatted stile, that gives access to the broch in the area to the right.

This is the view of Borgue Langwell broch from the gate.

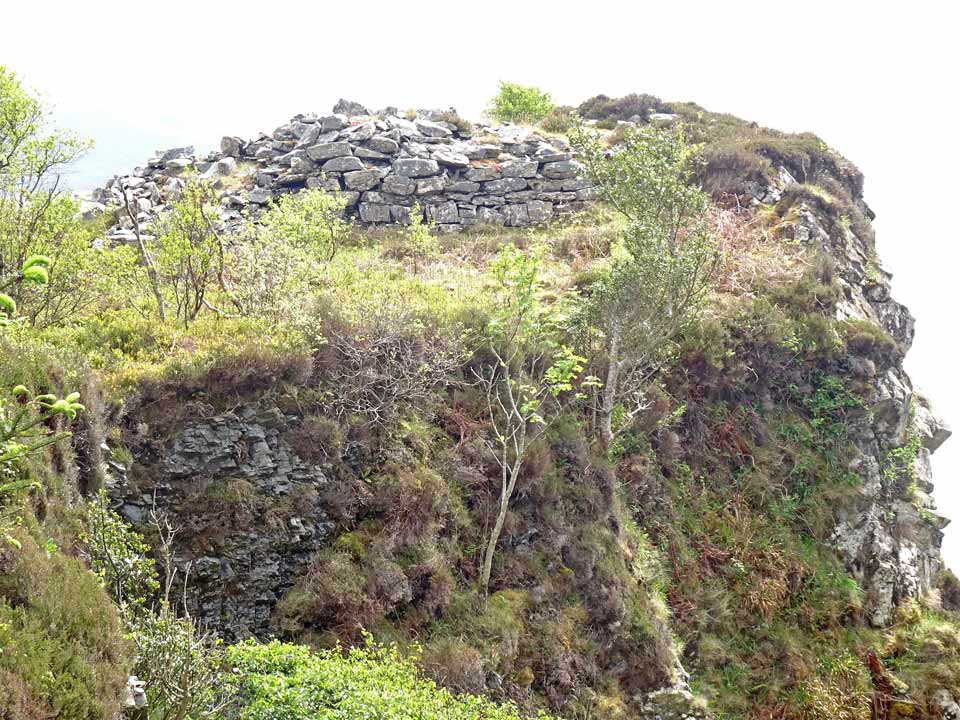
Borgue Langwell broch , showing its best (southwest) side, with walling courses reaching up to a metre high.

The stonework on the northern side of the broch has long since completely collapsed into this anonymous stoneheap.

The view across the northern stoneheap to the broch mound.
This is the most complete stretch of walling courses, located on the southwest of the broch. In places it measures over a metre tall.

Rudimentary walling course material on the south flank of the broch.

Isolated blocks peek out from the grassy dome of Borgue Langwell broch.

This composite of two photographs shows the profile of Ousdale Burn broch, with the entranceway in centre.

External view of the entrance passage and its blocky supporting lintel, now cleared of obstructions.

Looking into the interior of Ousdale Burn broch, through the restored entrance passage,

This image shows the consolidated walling adjacent to the entrance passage, from the internal court.

This is a composite panoramic photograph taken from the wallhead and looking towards the entrance.

This is a composite panoramic photograph taken from the wallhead and shows the entrance to the intra-mural stairway on the left.
The scarcement ledge is visible high up the wall in the centre of this view.

This is a composite panoramic photograph taken from the wallhead. The entranceway is at the extreme right while the aumbry in the walling is shown slightly left of centre.

The prominent scarcement ledge, which would originally have supported either an upper floor or a roof over the structure.

The wall recess (aumbry), possibly a storage area, containing a strange mis-shapen bust!

The large intra-mural chamber, viewed from the wallhead.

The intra-mural stairs, now cleared of rubble and vegetation, which would have led to the upper level of the broch.


The rugged cliffs of Leitir Fura promontory as viewed from the southwestern shore.
First view of Leitir Fura fort on emerging from the woodland.


Well constructed walling courses at the northeast of the promontory.

The interior of the fort is wholly reduced to structureless rubble.

This composite photograph illustrates the width of the extant stretch of walling.

View down the precipitous western cliffs to the beach.

Detail of the fort’s walling courses adjacent to what appears to be a ruined entranceway.


Leitir Fura Promontory Fort seen following an ascent from the eastern shore.


This is a 1983 photograph taken during the excavation of the cist. It is taken from an illustration on the Information board beside Hunebed D52 Diever.

Minera broch bound, with a few residual foundation level stones visible.


