
According to the OS map, this raised area is where 6c is, but it doesn’t really match the Somerset HER record.
Image credit: A. Brookes (2.4.2016)

According to the OS map, this raised area is where 6c is, but it doesn’t really match the Somerset HER record.

As far as I could tell, this is cairn 3. The position matches the OS 1/25000 and there is a definite low mound beneath and around the hawthorn bushes.

Cairn I from the south. The place where this photo was taken would have been in the midst of an extensive cremation cemetery.

By summer, cairn I is likely to be surrounded by high bracken.

The silver birches on cairn I greatly enhance the atmosphere.

Exposed stonework on cairn I.

The substantial cairn I.

Cairn I, beneath silver birches.


Fossils on the rocks outside the cave entrance.

Water cascades down into the cave entrance.
“Some of the world’s oldest prehistoric artwork, located in the Chauvet-Pont d’Arc cave in southeastern France, is actually 10,000 years older than previously thought, researchers said Tuesday.
The red and black cave drawings contained in the cave are more than 30,000 years old, according to a radiocarbon dating study published this week in the Proceedings of the National Academy of Sciences, a peer-reviewed US journal.”
More here:


The wider footprint of the west cairn. Across the valley, above the treeline, is Dolebury Warren hillfort.

Exposed cairn material of the western cairn.

The low mound is overgrown with bracken and brambles.

The cairn is in an area of felled forestry, right by the track but hidden by the raised verge and bracken. The single silver birch is a good landmark.

The eastern entrance, framing Steep Holm island.

The remains of the warrener’s house inside the fort.

The southern ramparts, dropping away to the steep, wooded gorge that bounds the south of the site.


Elevated view of the interior from the eastern ramparts. Brean Down and Steep Holm island can be seen in the distance.

Looking north across the Yeo valley. I think the low hill on the far left is Cadbury Castle (Nailsea), another of the large hillforts of this area.

The magnificent view northwest towards Weston-super-Mare, the Severn and South Wales. The prominent hill is Worlebury.

The higher eastern end of the northern ramparts.

Northern ramparts at their lower, western end.

Inturned banks flank the western entrance.

Impressive lines of defence to the south of the fort’s western entrance.
My route heads east again, passing one barrow on the map that doesn’t appear to exist anymore, a load of the cutest spring lambs you ever saw, and then the obvious mound of Rhino Rift barrow. It’s perched above the edge of a steep sided wooded ravine, which presumably is the Rhino Rift itself. The barrow is not round, rather it’s an elongated shape, higher at one end than the other. I’m not surprised to read Chance’s post that it has been considered as a possible long barrow, although it’s not that long.
Back on the main path, the summit is obvious straight ahead. The map shows a big group of barrows and it’s coming back to me that Thelonious posted some photos a while ago. The going is not too bad as the weather has been dry, but would be horrible in wet conditions.
The first barrow (Burrington 11) is to the north of the path, another substantial mound despite erosion and probable excavation. From it the barrow that the trig pillar sits on obscures the linear group to the east.
The summit mound (Burrington 13) has obviously been resurfaced fairly recently with a new cap of stonework to protect it from erosion. This is the highest point of the Mendip hills and a fantastic viewpoint. As well as the views north and west that I’ve had for most of the day, there are now views south that take in Glastonbury Tor as well as Exmoor away to the southwest.
It’s a well visited place as you’d expect, and while I’m here there are walkers, cyclists and horseriders at various times.
The linear barrow group (Burrington 14-16) immediately east of the summit is also cracking, with wooden signs warning visitors that it is ancient monument and to keep off to prevent erosion. I imagine that the summit barrow itself was always going to be the target for most visitors, so this seems a good way to compromise and keep the other monuments from further damage. Two more barrows (Burrington 18 and 19) lie to the south, providing an excellent spot to head away from the other people and admire the linear group profiled along the skyline.
On such a lovely day, with the wind and sun on my face, this is as good a place as I could wish to be. But by now it’s getting on for 3 o’clock, so I bid a reluctant farewell to the barrows and head east. The path has been resurfaced here and initially provides nice easy going after the boggier ridge. There is a last barrow on the south side of the path (Burrington 20) which sets me on my way downhill.
Eventually the path comes to the edge of the open access land, with fields laid out to the east and another path running north-south. Right at the junction of these paths is another barrow (Burrington 22), but it’s low and buried in heather, offering little in comparison with the group on the summit. I head north briefly to look for a final barrow (Blagdon 1). It proves to be buried under the fence line and badly eroded.
From here my path goes southwest, becoming increasingly wet and marshy. I’m soon hopping precariously from tussock to tussock, and it should come as no surprise to learn that one of the tussocks proves to be less solid than it looked. My tired legs refuse to keep me upright and I’m down on one knee, with an unpleasant feeling of cold, black water trickling into the top of my boot. Gah.
By now I’m feeling the need to press on, with the biggest hill of the day looming ahead, so I don’t stop very long to search. It is worth pausing to look at the unfolding view of the limestone cliffs across the gorge to the north. Somewhere in that hillside is Aveline’s Hole and there appears to be a hillfort or settlement on the hilltop above it. A good reason to come back to the area anyway.
The climb up onto Black Down is not too bad, a good clear path running above West Twin Brook. The excellent views north across the Severn/Bristol Channel give plenty to admire on each pause for breath. At the top of the ridge, the path is very eroded and muddy and I’m grateful that we haven’t had huge amounts of rain recently. The top of Black Down is a sponge that would make for a challenging visit in wet conditions.
There are plenty of people up here and it’s easy to see why the main path running east-west along the top of the hill is so churned up and eroded. Unfortunately, the same is also true of the pair of barrows immediately beside the path. The northeastern one has been worn down to its stonework and is in a sorry state, crossed directly by the path. The northwestern barrow has fared slightly better than its companion, not being quite so close to the main line of the path. A sparkly slab lies on the edge of the mound, crystals catching the beautiful spring sunshine.
The erosion is a shame as these are excellent barrows, substantial and upstanding, with terrific views. I look down on a now-distant Dolebury Warren and reflect that this walk is probably going to be a bit longer than I thought! Across the Bristol Channel, the hills and mountains of South Wales are still lying under dark clouds and I’m not in the least sorry I decided on the last minute change of plan this morning.
I head south across tussocky and damp ground to the possible third barrow in the group. This one is lower and difficult to discern under dense vegetation. So dense in fact that I startle and flush a deer from the side of the mound, watching it gracefully bound across the treacherously boggy ground.
There are more barrows shown to the northeast, as well as another cave called Aveline’s Hole. I pass various deep sinkholes, glorying in the names Bos Swallet and Rod’s Pot. Some of these are huge scoops in the ground. As the path gives way to a metalled road, a proper look at the map shows Aveline’s Hole is actually on the other side of a steep gorge, so I reluctantly abandon any idea of a visit today. There are however three barrows (the OS shows one cairn and two tumuli) in an open area of common below the northern slopes of the moorland proper.
This area is deep with the brown stalks of last year’s bracken, which makes barrow hunting somewhat difficult, although not as much as it would be on a summer visit.
I start off looking for the cairn, the northern of the three monuments on the map. After foolishly hacking my way into and back out of a briar patch thinking it was the barrow, I realise that it’s actually a very prominent feature crowned with a stand of silver birch trees. On closer inspection it’s a beauty, lots of stonework and an crisp footprint (although no kerb as such). The trees are no doubt causing damage but enhance the atmosphere immensely, especially as the sun at its zenith is now beating down through a cloudless blue sky. Something of an unexpected highlight, and definitely worth the visit.
Heading south the other two marked barrows are less easy to find. The middle barrow is a low mound next to one of the many paths that criss-cross this open area. It’s misshapen and has hawthorn growing on it, assuming I’ve even found the right thing under all the bracken. I can’t find anything in the marked position of the southernmost barrow, although I think it’s likely to be somewhere near a single silver birch, as these trees seem to feature close to many of the barrows in this area. Either it’s deeply buried in bracken or the map has it in the wrong place.
Before heading on to the open moorland, the map offers one more site: Read’s Cavern. Heading ESE from the junction of paths, the track follows the course of the stream, soon opening onto a small clearing with a seat. The cavern lies immediately to the north, where the fast-running waters, cold and crystal clear, disappear into the side of the hill. The cave appears to be accessible, but only if you’re prepared for a proper caving expedition. The limestone rocks around the entrance are liberally decorated with fossils of sea-creatures from impossibly distant epochs of time.
The entrance is very small and the water pouring in suggests an instant soaking. A sign fixed to the rockface above gives an emergency call-out number in case of difficulties. I’m not equipped either mentally or physically to go pot-holing on this trip, so I sit near the entrance for a while and watch the splash and sparkle of the water.
To the southeast, the route drops gently towards the upper end of a valley. On the other side is a dense conifer forest that wouldn’t be out of place above the South Wales valleys. Somewhere over there the OS map shows a pair of cairns, which I’m intending to call in on before climbing onto the main Mendips ridge. The first thing that stands out is a large area of felling – the cairns are somewhere in it, which will either make them easy to find or impossible.
Luckily there’s not a huge amount of height loss to cross the valley at its head. Bridleways head off in several directions – to get to the first cairn I take the one heading west then a fork to the southwest, which slopes gently uphill into the felled area. The map shows the cairn at a bend in the track, right in the heart of the felling. I could be back in the Welsh forests here. Forestry clearance is a messy business, often leaving deeps ruts from the machinery and then a burst of vegetation as the tree covers disappears. This is no exception. I find the cairn right by the track, hidden at first glance by the high verges pushed up by logging vehicles. It’s in a sorry state, the edge has been damaged by the felling operation and it’s covered in a tangle of brambles and bracken. The only redeeming feature is a single silver birch, left to grow on the western side of the mound.
Once over the pitiful state of the immediate surroundings though, the location can be appreciated. The cairn looks down the steep-sided valley between Dolebury Warren to the north and the high Mendips ridge to the south. As with many of the upland cairns of South Wales, there seems to be a definite relationship between watercourses and the placing of these Bronze Age funerary monuments.
I head back the way I’ve come to the junction of paths. The second cairn is also in a felled area, this time a narrow triangle of land between tracks. The OS map shows it as right next to a bridleway heading onto Black Down. Unfortunately the felling here has left behind a deep tangle of bracken and water-filled ruts and ridges. I head uphill, but the track seems to follow a slightly different route to the map and after a while of fruitless prodding about in the bracken and tree stumps I reluctantly abandon the search. I’m sure it’s still here somewhere, but I won’t be the one to find it this time.
The approach is through woods, climbing fairly sharply although not quite taking the direct route up the scarp. I’m anticipating a slog but in fact the ramparts come into sight pretty quickly – after spending so much time in the Welsh uplands it’s easy to forget that the hills here are not very big, for all that they’re very steep-sided. The sun starts to break through as I reach the western entrance.
It’s immediately apparent that this is a first rate hillfort in great preservation. There are two lines of ramparts, the inner one much higher than the outer and built of stone blocks. The western entrance is at the lowest part of the fort, which continues to climb steeply towards the top of the hill a good 30 metres higher than where I’m standing. The banks are inturned and the entrance appears to be an original one.
I follow the rampart along its northern side, steadily climbing as it goes. The fetish for building shelters that has damaged so many Bronze Age summit cairns is in evidence here too, with the plentiful stone of the rampart obviously being too difficult to resist messing about. Actually, it’s a pretty windswept place. Although the sun is now out, when it occasionally dips behind ragged cloud there’s a serious chill and I’m quickly reminded that it’s still early in the year to be wandering around a hillfort in a t-shirt.
As the rampart climbs, the views open out wonderfully in every direction but east. The Severn is the main event, looking towards Steep Holm and Flat Holm islands that we got familiar with walking the coast path on the opposite side. I also recognise Brean Down and assume the urban sprawl to be Weston-super-Mare. Almost due west a wooded hill with open interior is the neighbouring Banwell Plain hillfort.
The ditch between the ramparts is overgrown in places, but there is obviously regular clearance of scrub going on. A couple of dog walkers and a couple of walkers are dotted around the fort, but it’s a big place and there’s no sense of intrusion. Reaching the very top of the fort there’s another entrance facing east, also looking like it’s probably original. The views are now magnificent, right across to South Wales – if the cloud and rain lifted there, I’ve no doubt the Brecon Beacons would be readily visible. To the south the high ridge of the Mendips blocks the view, open moorland that will be my next objective once I leave here.
But first there’s the southern circuit and interior. On the south side the rampart is less built-up, but the reasoning is obvious as the ground falls very steeply away to a lovely wooded gorge below. Rowberrow church is visible across the ravine, and in a field beyond there is a sizeable round barrow that just manages to be obscured by trees no matter where I stand on the rampart. I head back up into the fort’s interior, which is heavily scarred and pitted. The fort’s name gives the reason away, as it was the site of a huge artificial rabbit warren in the 17th century. At the highest part of the interior, just inside the eastern entrance, there is a low curving linear feature with a square structure inside. This was apparently the garden wall and footings of the warren-keeper’s house. I wonder what it must have been like to live here, surrounded by rabbits and the ghosts of the original inhabitants. Whatever, it makes a great spot for an early lunch before heading east.
A final touch as I leave is the way Steep Holm in the Bristol Channel is framed by the eastern entrance. What a great place this is. I reluctantly turn away, hugely impressed by this great fort with its sweeping views.
The summit of Beacon Batch is crowned with a superb round barrow cemetery, one of which has been rebuilt and topped with an Ordnance Survey trig pillar. A further two barrows lie to the east on the edge of the open access land.
Details of the prominent barrows from Somerset HER:
Burrington 11/T170 (ST 48375725)
A low mound with a cover of heather except at the S where the path has removed a broad swathe of vegetation. The stone of the mound is exposed and being loosened.
This barrow is the most westerly in a group of six (PRNs 24104, 24105, 24106, 24107 and 24108). The barrow is defined by a sub-circular mound which measures 10m in diameter. The barrow appears to have been incorporated into the Black Down bombing decoy (PRN 24114).
Burrington 13/T172 (ST 48455726)
2m high and 15m diameter with triangulation point on top Good turf cover apart from the top where everyone stands. Here stones are exposed but stable.
Burrington 14/T173 (ST 48485726)
1.75m high and 13m diameter. Whole of the top area dug into and stones exposed. There is active erosion down into the central hole which is 4m diameter and up to 1m deep. Grass covered with little heather.
This barrow is the third most easterly in a group of six (PRNs 24103, 24104, 24105, 24107 and 24108).
Burrington 15/T174 (ST 48525725)
2m high and 15m diameter. The maximum height is at the rim due to upcast from the centre hole which is 4m diameter and up to 1.75 deep. Loose stones lying in the bottom. Good turf cover.
This barrow is the second most easterly in a group of six (PRNs 24103, 24104, 24105, 24106 and 24108). An external ditch is situated adjacent to the eastern side of the mound measuring up to 2m in width.
Burrington 16/T175 (ST 48545725)
1.75m high and 15m diameter Marked central depression but no stone exposed. Good turf cover, some heather.This barrow is the most easterly in a group of six (PRNs 24103, 24104, 24105, 24106 and 24107). The mound has an external ditch measuring up to 3m in width. A sub-oval depression is visible in the top of the mound, probably the result of an excavation in the past, measuring up to 6m in length by up to 3m in width.
This next is to the SE of the trig point and the linear group, on the south side of the path:
Burrington 20/T126 (ST 4861057150)
Mound 2m high and 15m diameter. Flat topped with a central animal hole Slight berm to the S. Heather covered. Major trackway passes by on the N side.
The next two lie to the south of the trig point:
Burrington 18/T168 (ST 48455711)
0.25m high and 11m diameter. Not as obvious as some of the others in the group. Cut into on the SE side by a trackway running S from the trig point. Here cairn material is spilling out and being spread along the track. Central depression with a few stones exposed. Heather covered.
This barrow is the most westerly in a group of four (PRNs 24109, 24111 and 24112).
Burrington 19/T167 (ST 4848057080)
2m high and 15m diameter crossed by a trackway running c.SE from the trig point. Marked central depression where cairn stones are exposed. Covered with turf, heather and gorse on the SE side.
Appears stable under a cover of dense heather and low gorse. There is a narrow path across from N-S which is causing some erosion of the N crest of the mound. This barrow is the second most westerly in a group of four (PRNs 24109, 24110 and 24112).
The final two barrows marked on the OS 1/25000 are to the east of the summit, on the edge of the access land:
Burrington 22/T166 (ST 4899056930)
Round barrow, isolated under heather and moorland 0.9m high and 18m diameter.
Possibly mentioned as “the broken barrow” in the Anglo Saxon charter of AD904 for Wrington. Path to west eroded by bikes and horses – path to east not as bad.
Blagdon 1/T165 (ST 4908057030)
Mound crossed by stone wall running c.N-S which is the old Burrington-Blagdon parish boundary. 1m high and 11m diameter, the W very small part lies in undisturbed heathland. The E part is very stony, part of very rough grazing. Stones cleared from the field at some time lie along the wall and on the barrow. There is also a certain amount of brick and mortar, possibly from a small building at one time, on the mound. Could have been recently dumped. A drainage ditch to the E of the stone wall approaches the barrow but stops short of it. The mound is very spread and almost devoid of vegetation.
Possibly the “broken barrow’ referred to in the Anglo Saxon charter of Wrington (AD904).
Circular ditch identified indicates that centre of barrow is mostly destroyed by a path which is now avoided as muddy – path now diverts over ditch causing further erosion.
Two substantial if eroded Bronze Age round barrows and a possible third, at the western end of the summit ridge of Black Down. Details from Somerset HER:
Burrington 8/T177 (ST 47325710)
13m diameter and 1m high under heather. Whole area rather disturbed. There are several small deep holes on the mound where soil has been leeched from between the stones of the cairn. Lies on the N side of a well used ridge path.
A fairly prominent mound with a generally dense cover of heather. The southern edge is crossed by the path and is denuded of vegetation and suffering damage. Very muddy areas may mark the position of the barrow ditch.
Burrington 9/T178 (ST 47355710)
15m diameter and 1.75m high on N side of ridge path. The S edge of the mound is crossed by the path where some stone is exposed. Mound rather uneven with stones protruding, otherwise grass covered with a few heather plants.
A fairly prominent mound with a dense cover of heather except where crossed by the path. This has removed all vegetation and topsoil exposing the stone make-up of the mound. The path has made a significant depression in the top of the mound.
Burrington 9a/T179 (ST 47335707)
The southern mound is not very distinct but is probably a low, heather and gorse covered mound some way S of the path. Stable and undisturbed beneath dense ground cover.
This area of common north of Black Down is the site of an extensive Bronze Age cemetery of cairns and cremations. Beaker sherds were also found in Bos Swallet, a large sinkhole to the west of the cemetery. Details of the cairns that appear on the OS 1/25000, from the Somerset HER:
Burrington 1/T5 (ST4743058460)
Possible saucer barrow. Consists of a ring mound and an inner mound. Total diameter c41ft with mound 25ft diameter and 2.5ft high. Built of stones.
Excavated by H Taylor following R.F Read c1925 and 1950-6. Primary inhumation (inferred) with barbed wire type beaker (Clarke’s Barbed-wire type no 784) in a grave 2ft 3ins by 3ft 7ins which also contained fragments of burnt bone. There were inner and outer ring-cairns or retaining circles. Secondary fragments included one accompanied by a food vessel, and a cremation with a primary series collared urn. On the W and SW margin of the barrow was a cremation cemetery.
Burrington 3/T6 (ST 47465836)
Possible saucer barrow total diameter 35ft and central mound about 1ft high.
Excavated by R.F Read in 1923 – primary cremation in stone cist 2ft by 1ft 8ins with fragment of polished flint implement. Mound truncated.
Section prior to excavation suggests a disc barrow. Cist was previously robbed.
Burrington 6c/T6c (ST 47435820)
Barrow 21ft diameter and 1.5ft high. One of several that occur locally but do not really fit into any category. Consists of a low mound roughly ring shaped with a gap in it communicating with the central depressed area. This area does not seem to be due to disturbance. The gap is to the S.
Information from Pastscape:
A cave near Burrington Combe, discovered by RF Read in 1919 and excavated by Professors Tratman and Palmer for the University of Bristol Speleological Society from 1919 to 1925 and again in 1929. The bulk of the material discovered relates to use of the cave in the Iron Age, with finds including pottery, antler cheek-pieces, bronze fittings for chariot wheels, part of a bronze bracelet, stone spindle whorls and some iron shackles. Some human remains and a quantity of animal bones were also discovered. The sole find of definite Roman date, a coin of Magnentius, is regarded by Branigan and Dearne as “an accidental contamination of the site”.
It was originally called Keltic Cavern.
Two cairns, now in (felled) forestry. Info from Pastscape:
Shipham 3/T8 (ST 46125844)
A round cairn excavated circa 1924. 37 feet in diameter and on average 2 feet high, a very small quantity of calcined human bone was found on the original ground surface beneath the mound,which was restored after excavation. The cairn is listed by Grinsell as Shipham 3, and by the UBSS as cairn T8. Circa 1960, a leaf-shaped flint arrowhead was found amongst road-spoil adjacent to the cairn. It seems unlikely to be associated.Shipham 4/T7 (ST 46655843)
T.7: Tumulus 35’ dia. x 1’ high. Excavated 1923. Cremation found in inverted enlarged food vessel, Abercromby type 7, with pygmy cup nearby: the whole encircled by vertical slabs and covered by an internal cairn.

There’s a real feeling of edge of the world remoteness here.


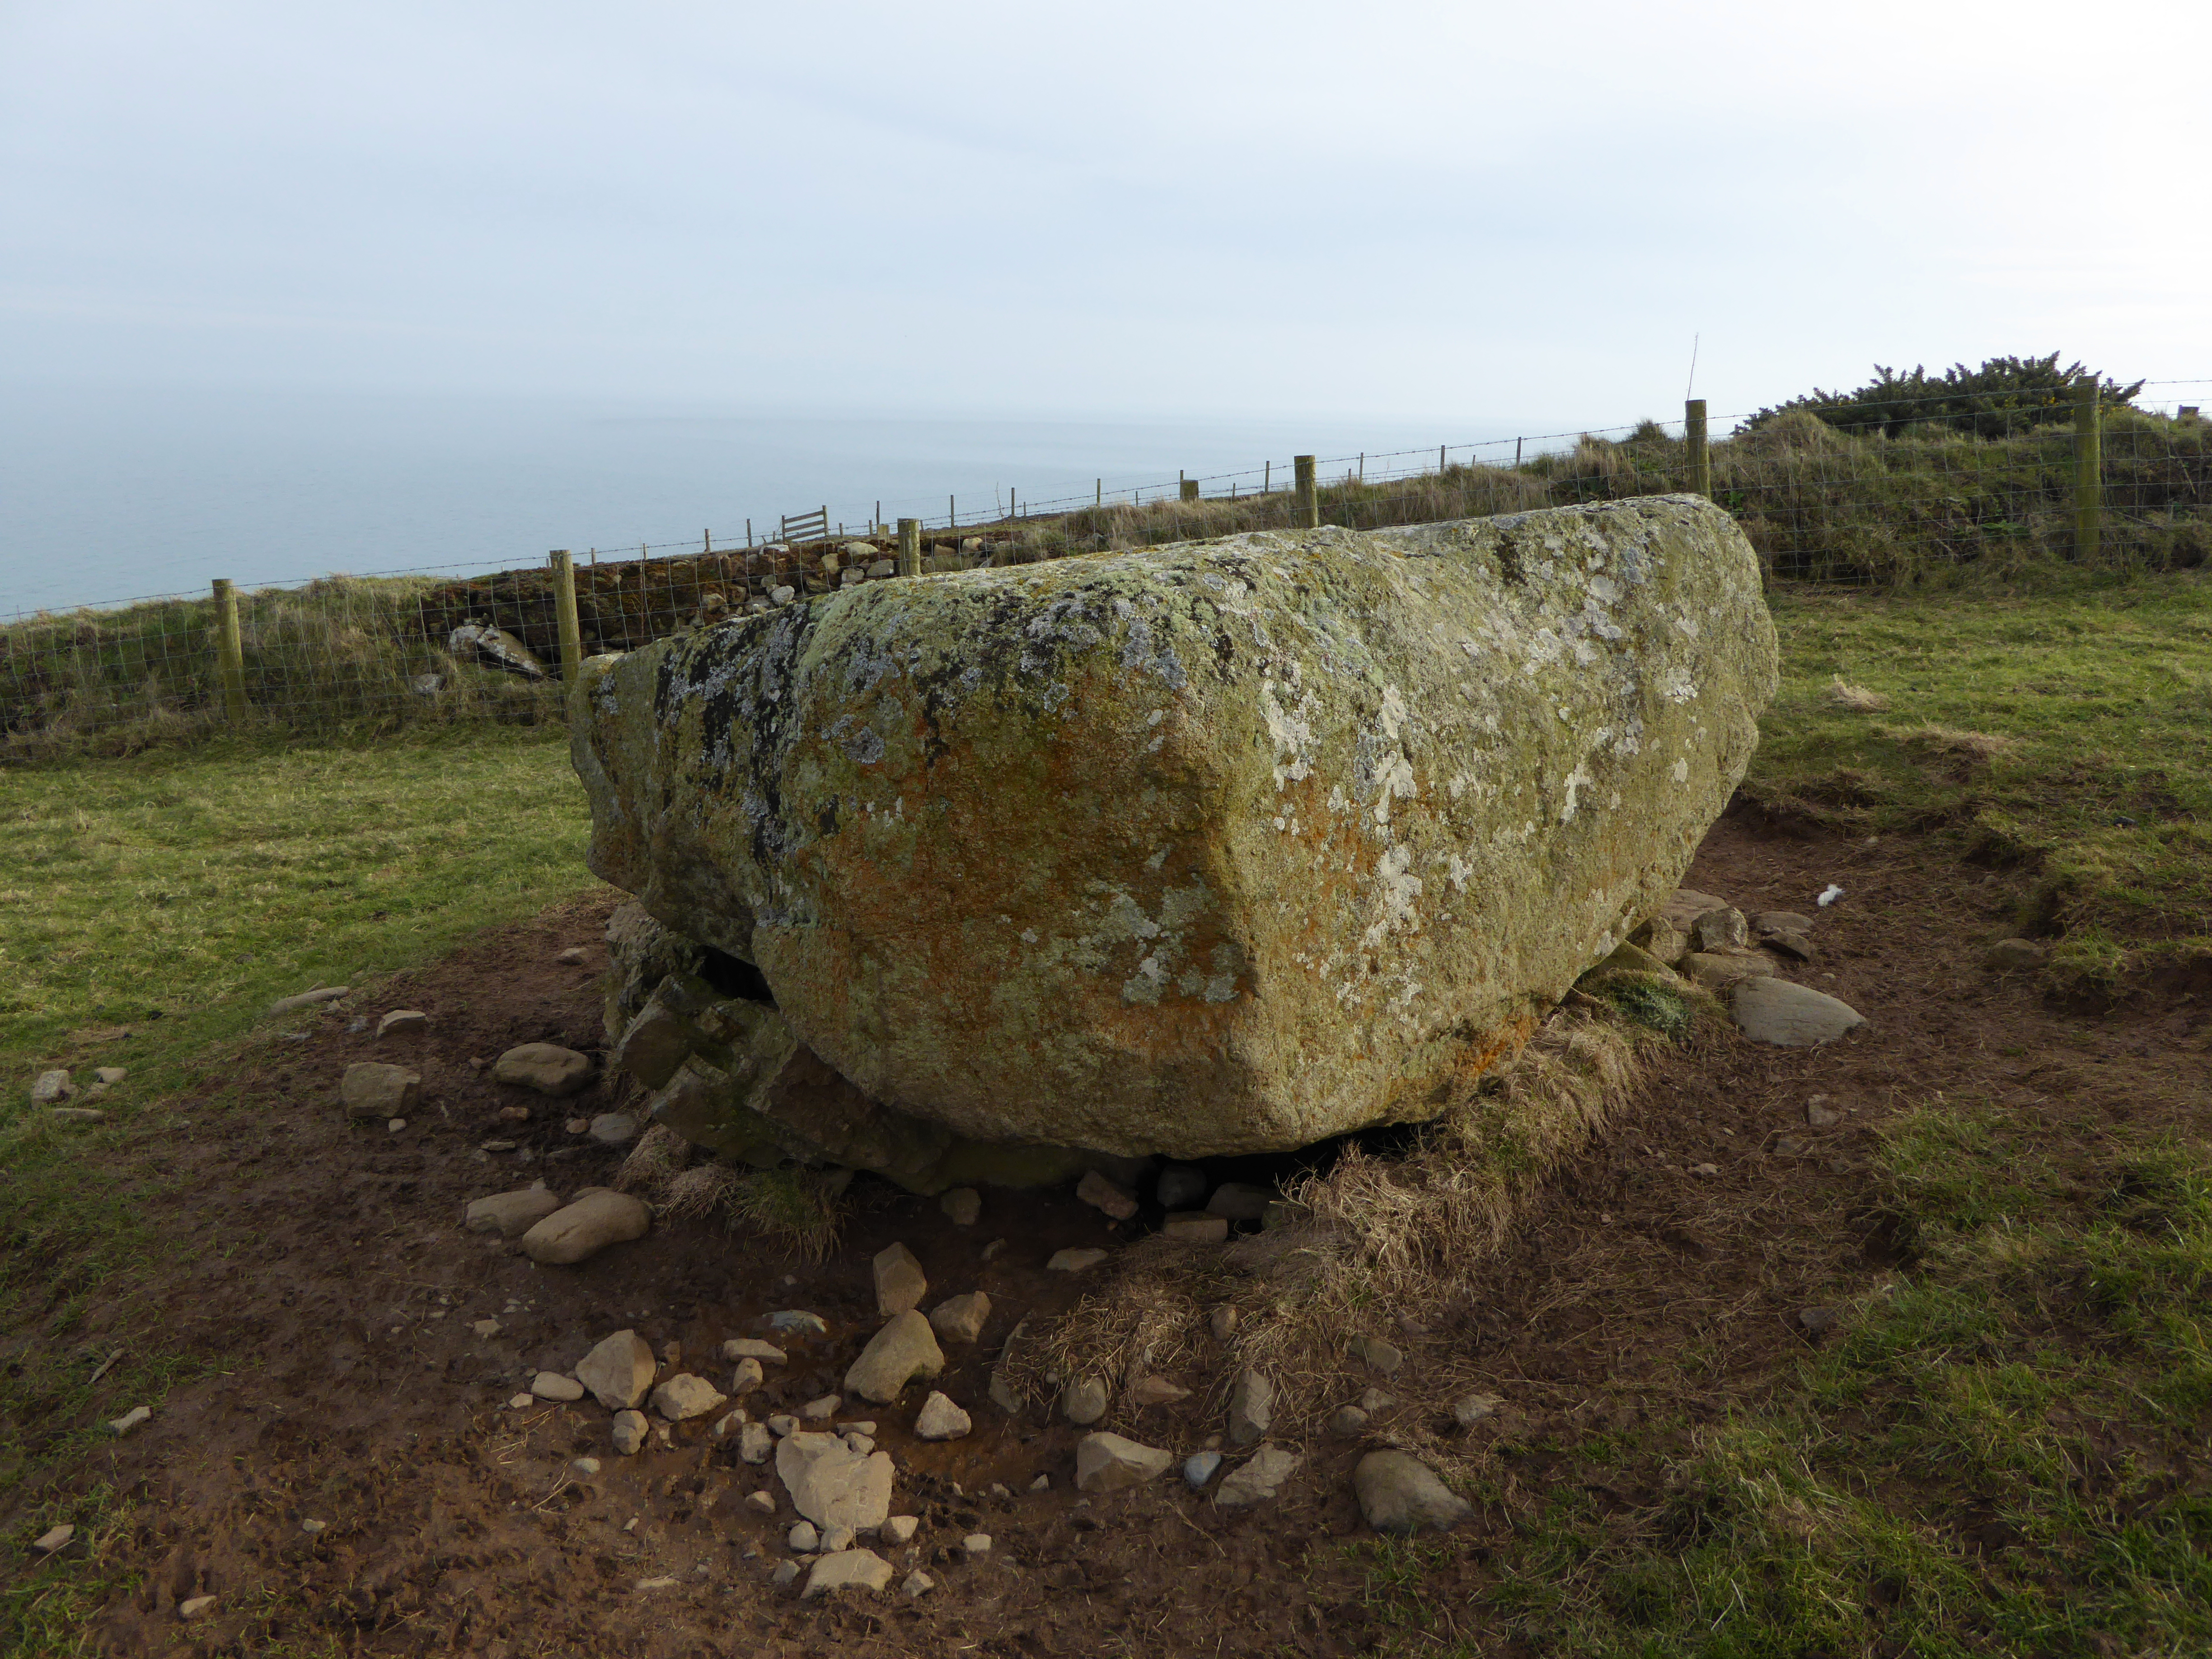
This is a massively thick stone, interesting to speculate on whether it was ever properly elevated on supports.

Looking northeast towards Porth Ceiriad. Pared Mawr cliff fort is visible as a bump on the skyline, centre.

From the south. The new fencing corridor doesn’t make for the loveliest of settings.

The single rampart survives to a decent height.

Squared corner at the northwest of the rampart.
